As part of a project I’m working on, I have a requirement for a NoSQL database. There are numerous offerings out there, of which MongoDB and CouchDB appear to be the most popular. So which system should I choose?
First, a little more information about my use case. I am part of a team who will be sending a balloon up into near-space (if you’re interested, you can find out about us on our Wordpress page). As it is in flight, the balloon will be sending telemetry information via radio back down to a ground station. Once we receive the data at the ground station, we store it in a database of some kind. The decoded data is not going to be particularly relational, hence a NoSQL database seems like a good storage method. The data will be handled as Javascript objects so either MongoDB or CouchDB seem to be a fairly good fit, given that they work by storing JSON documents.
The CAP triangle
A few years ago, Nathan Hurst wrote a blog post giving a visual guide to NoSQL systems. That post included the image below.

As you can see, there are three primary concerns you must balance when choosing a data management system: consistency, availability, and partition tolerance.
- Consistency means that each client always has the same view of the data.
- Availability means that all clients can always read and write.
- Partition tolerance means that the system works well across physical network partitions.
As you can see in the diagram, MongoDB and CouchDB are built with a slightly different focus. Both scale across multiple nodes easily, but MongoDB favours consistency while CouchDB favours availability. In the MongoDB replication model, a group of database nodes host the same data set and are defined as a replica set. One of the nodes in the set will act as primary and the others will be secondary nodes. The primary node is used for all write operations, and by default all read operations as well. This means that replica sets provide strict consistency. Replication is used to provide redundancy - to recover from hardware failure or service interruptions. For more information, I would look at the Replication section of the MongoDB documentation.
CouchDB uses a replication model called Eventual Consistency. In this system, clients can write data to one node of the database without waiting for other nodes to come into agreement. The system incrementally copies document changes between nodes, meaning that they will eventually be in sync. More information can be found on the Eventual Consistency page of the CouchDB documentation.
Which system you go for would normally be determined by the priorities of your project. If your app involves trading in financial data or online commerce, you might want to ensure that all clients have a consistent view of the data. In other applications, the high availability offered by CouchDB might be more important, even if some clients are seeing data which is slightly out of date.
My use case is likely to only involve a single database node and I’m not expecting particularly high database traffic. With these relatively flexible constraints, I would expect that either MongoDB or CouchDB would be able to meet my use case without any problems. In the rest of this post I’ll look at how easy both systems were to use and I’ll make my decision based on that.
The data to be stored
The snippet below shows an example of the type of telemetry information which we’ll be storing.
{ payload_name: '$$icarus',
sentence_id: '724',
time: '12:19:07',
latitude: '52.071851',
longitude: '0.253108',
altitude: '27539',
speed: '36.11',
heading: '113.8',
temp_internal: '17.7',
temp_external: '-18.7' }
We’ll be receiving data every few seconds. In this blog post, we’ll be running a database server locally and our client code will be running in Node.js. In the next couple of sections, we’ll look at how to store the data and how to make the kind of queries which we are likely to make on it. Let’s look at MongoDB first.
MongoDB
With MongoDB installed, the server can be started by calling mongod from the command line. Once running, we’re in a position to add data and make queries. In this post, two separate Node.js processes are used; one to insert new data into the database when it becomes available, and the other to make queries on the database.
To use MongoDB directly from Javascript rather than using the Mongo shell, we could either use the official MongoDB Node.js driver or we could use an Object Document Mapper (ODM). Mongoose is the officially supported ODM for Node.js, so it is what I have used for this work.
Mongoose requires you to define a schema for your data. This is actually a departure from vanilla MongoDB, which doesn’t require data in a collection to have a common schema. This will match our use case though, so it’s no big deal here. I’ve created a module which defines the schema we’ll be using and called it telemetryDb.js.
'use strict';

var mongoose = require('mongoose');

module.exports = {
url: 'mongodb://localhost/telemetryDb',
telemetrySchema: function() {
return new mongoose.Schema({
payload_name: String,
sentence_id: String,
time: String,
latitude: Number,
longitude: Number,
altitude: Number,
speed: Number,
heading: Number,
temp_internal: Number,
temp_external: Number
});
},
telemetryModelClass: function() {
return mongoose.model('TelemetryInfo', this.telemetrySchema());
}
};
As well as defining the schema, we declare the URL to the database and a model class which is based on the schema. Mongoose uses this model to create new documents and to query the database.
Writing to the database
Now let’s add documents to the database when new telemetry data is received. In our Node app which is receiving the telemetry data, let’s add a dependency on Mongoose and our schema module.
var mongoose = require('mongoose');
var telemetryDb = require('./telemetryDb');
We can now create and open a connection to the database. We declare the model class as well - we’ll use that to create new telemetry documents later on.
var db = mongoose.connection;
mongoose.connect(telemetryDb.url);

db.on('error', console.error);
db.once('open', function() {
});

var TelemetryDbModel = telemetryDb.telemetryModelClass();
Now, every time we receive new telemetry information, we can write it to the database.
// telemetryInfo is the Javascript object containing our new data.
// We create a Mongoose model object from it, then save that to
// the database
var dbTelemetryInfo = new TelemetryDbModel(telemetryInfo);
dbTelemetryInfo.save(function(err, dbTelemetryInfo) {
if (err) {
return console.error(err);
}
// We log to the console, just to show what we've saved
console.log(dbTelemetryInfo);
});
Querying the database
In a separate process, we’ll query the data. In a real-world app we’d probably want to see a snapshot of the latest data, and we might want to display a graph of historical data, such as altitude over time. Let’s write some queries to get this information. First, let’s create and open a connection to the database.
'use strict';

var mongoose = require('mongoose');
var telemetryDb = require('./telemetryDb');

var db = mongoose.connection;
mongoose.connect(telemetryDb.url);

db.on('error', console.error);
db.once('open', function() {
});

var TelemetryDbModel = telemetryDb.telemetryModelClass();
Now let’s write our queries. First we’ll want to get the latest data value. MongoDB provides a rich query interface which allows you to specify query criteria, projections, sort orders and limits. Mongoose provides a nice interface on top of this, which allows you to build up a query via their QueryBuilder interface.
TelemetryDbModel
.find()
.sort('-time')
.limit(1)
.exec(function(err, data) {
if (err) return console.error(err);
console.log(data);
});
As you can see, we used the Mongoose model class we created earlier to build up our query on the data. We specify that we want to sort data in descending time, and we’re only interested in the first result (the one with the latest time). Once the query has executed, we log it to the console. As well as the latest snapshot of the data, let’s get the historical altitude values. In this case, we sort the data into ascending chronological order and select just the time and altitude fields.
TelemetryDbModel
.find()
.sort('time')
.select('time altitude')
.exec(function(err, data) {
if (err) return console.error(err);
console.log(data);
});
Great, so now we have a system where we’re saving telemetry information to the database when we receive it, and we’re able to query it in order to display the information. I like the query interface that MongoDB offers, and the QueryBuilder interface which Mongoose builds on top of this also seems very powerful. Now that we have a working system with MongoDB, let’s take a look at how to implement the same functionality in CouchDB.
CouchDB
As with MongoDB, the first thing to do is to get a database server up and running. I’m running on a Mac and this is simple in that environment. I haven’t tried this on a Windows machine, but I imagine it would be similar there. On a Mac, you just download a zipped version of the CouchDB app, then unzip it and copy it to the Applications folder on your machine. After doing that, you can launch the app using Launchpad, and it will start the database server and open up Futon, its web-based administration panel. Futon will look a little like the screenshot below.
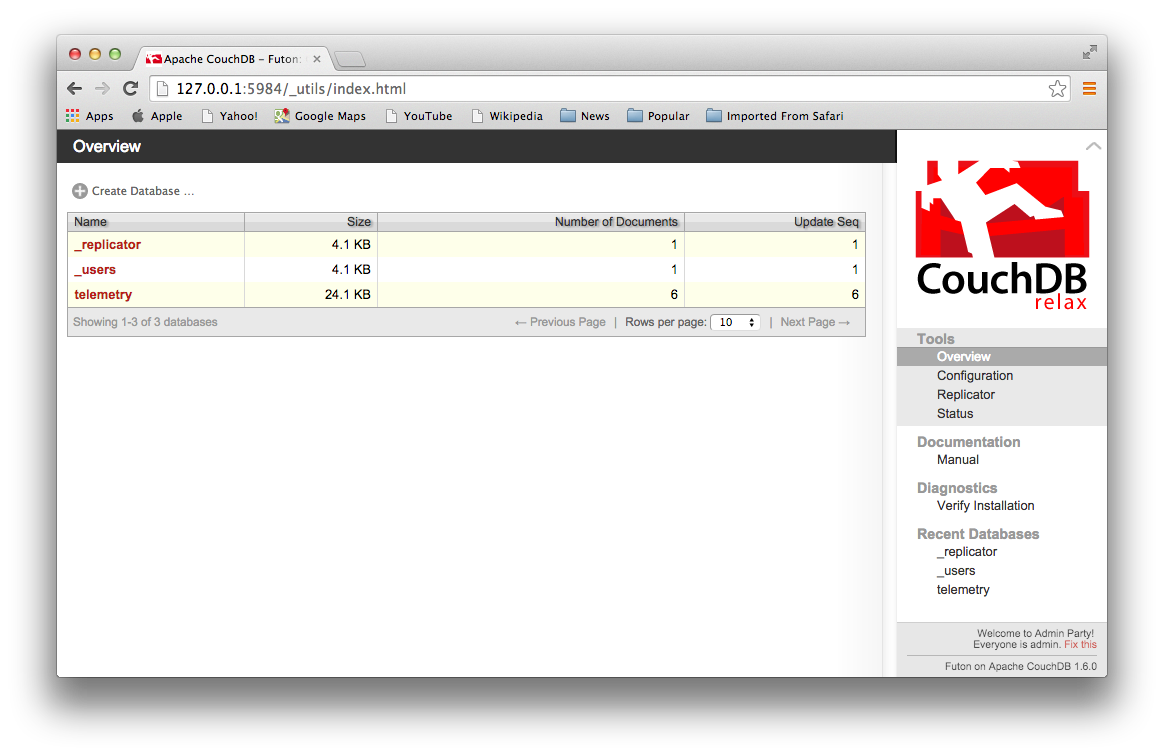
Futon gives you a button to create a new database. As you can see, I’ve used that to create a new database for our data, called telemetry. Now that we have a database, it’s time to populate it when we receive new telemetry information.
Writing to the database
CouchDB uses HTTP requests to populate or query the database, so we could just write HTTP PUT requests to do this. I’m going to simplify things even further though by using a 3rd party module to help. There are a few available but I’ve gone for Cradle in this example as it seems to be popular and offers an easy-to-use API. In the Node app where we receive telemetry information, we’ll add functionality to write any new data to CouchDB. At the top of the app, add a dependency on Cradle and create a connection to the database.
var cradle = require('cradle');

var db = new(cradle.Connection)().database('telemetry');
Now, whenever we receive new data, let’s write it to the database.
db.save(telemetryInfo, function(err, res) {
if (err) {
console.error(err);
}
console.log(res);
});
Cool, that was easy to do. Now let’s write some code to query the database once we’ve populated it.
Querying the database
To query the database in CouchDB you need to define a MapReduce function. These functions are declared as views within a design on the database. I’ve written some code below which will create views for the common types of queries which we will need. This code should be run once against the database to define the views. Once they are defined, we can query the database for the results of a particular view at any time.
'use strict';

var cradle = require('cradle');

var db = new(cradle.Connection)().database('telemetry');

db.save('\_design/telemetryViews', {
all: {
map: function (doc) {
emit(doc.time, doc);
}
},
altitude: {
map: function (doc) {
emit(doc.time, doc.altitude);
}
}
});
As you can see, I’ve defined two views on the database - one which returns all data and one which just returns altitude data. The results of each map function are sorted by their keys, which in this case are the times of the data.
Now that we’ve defined some views on our data, let’s use them to query the data we’ve received. We make one query to get a snapshot of the latest data, and another to get the historical altitude data which has been received from the balloon.
'use strict';

var cradle = require('cradle');

var db = new(cradle.Connection)().database('telemetry');

db.view('telemetryViews/all', {descending: true, limit: 1},
function(err, res) {
console.log('Get latest:');
res.forEach(function(key, row, id) {
console.log('%s: %s %s %s', key, row.altitude, row.latitude,
row.longitude);
});
});

db.view('telemetryViews/altitude', function(err, res) {
console.log('Altitude data:');
res.forEach(function(key, row, id) {
console.log('%s: %s', key, row);
});
});
Conclusions
So, I hope you’ve found this blog post informative. Although my use case wasn’t pushing the performance boundaries of either system, I found it interesting learning how to use both. I was impressed by how easy it was to implement the functionality I wanted.
I found I slightly preferred using MongoDB due to its SQL-like querying syntax, but that could just be due to the fact that I’m more used to querying in that way rather than using MapReduce. I still found CouchDB a good system to work with.
If you need dynamic queries MongoDB will be the better option, as CouchDB requires you to define your views up front. Mongoose introduces the constraint that all the data in a collection must have the same schema. However this is a constraint introduced by Mongoose rather than MongoDB itself, and you could always use an alternative ODM or the MongoDB Node.js driver instead. I stuck with Mongoose as I liked the interface it offered for building queries.
If you have any questions, thoughts or feedback on this post, let me know! The full source code is up on my GitHub page, as part of the Project Latex project: https://github.com/DanGorst/project-latex
Dan G