
I’m relatively new to the world of single page applications and have just finished a project built using AngularJS. What we built was impressive but I had the following reservations:
- The learning curve was steep (it’s not just me right?!).
- The code was difficult to dive into for new developers.
- It was very opinionated. It was the AngularJS way or the incredibly-painful-bending-over-backwards-to-make-it-work-the-way-you-want way.
It’s not just AngularJS that has a lot of these problems. Frameworks are getting bigger and bigger and more and more opinionated. Urgh. There must be an easy way for a simpleton like myself.
My interest was piqued then when I heard about a new framework called Flight brought to you by Twitter. It bills itself as non-opinionated and a doddle to learn.
In this blog I’ll introduce the framework in a little more depth by building and testing a simple application. Along the way we’ll meet some of the key features and by the end you should have a good grasp of the fundamentals.
If you want to skip the waffle and go straight to the code then click here.
Assumptions
This blog assumes the reader has a basic knowledge of javascript, jQuery and Jasmine and a healthy curiosity. The application we will be building is plumbed together using RequireJS.
The project
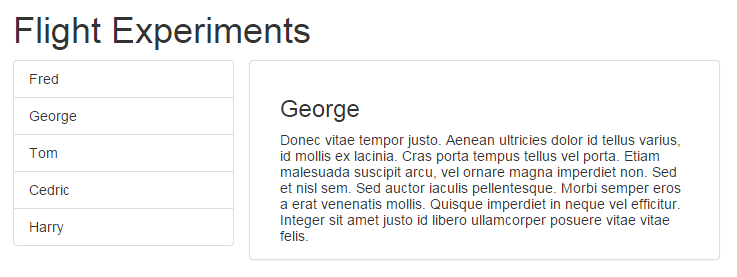
In this blog we’ll build a simple application that has a list of items to select from in the left hand panel. In the right hand panel will be a more detailed view of the selected item. Noddy stuff, but useful to illustrate the basic concepts.
Component parts
Components are the building blocks of a Flight application. A component is a small, cohesive unit of functionality which is attached to a DOM element. They have zero knowledge of each other and once they are attached to the DOM they are on their own. This makes testing them incredibly simple. No dependencies to stub as there are no dependencies! “So how do they communicate with each other?!” you might ask. We’ll get there.
Components are declared using the component method and are attached to the DOM using the attachTo method. For this project we’ll have a listComponent which describes the list panel, a detailsComponent which describes the details panel and a dataComponent which will hold our data (we’ll plonk this on the document node).
Here’s our dataComponent:
define(['flight/lib/component'], function(defineComponent) {

    // Data here
    var data = [{id: 1, name: "Fred", details:"Lorem ipsum"}];

    function dataComponent() {
        // Code goes here
    }

    return defineComponent(dataComponent);
});
Our listComponent:
define(['flight/lib/component'], function(defineComponent) {

    function listComponent() {
        // Code goes here
    }

    return defineComponent(listComponent);
});
Our detailsComponent:
define(['flight/lib/component'], function(defineComponent) {

    function detailComponent() {
        // Code goes here
    }

    return defineComponent(detailComponent);
});
As it stands this won’t do anything as none of our components are attached to the DOM so let’s do that now. I used a little bootstrap for the styling. Here’s our html:
    <h1>Flight Experiments</h1>

    <div class="container-fluid">
      <div class="row">
        <ul id="list" class="col-sm-4 list-group"></ul>
        <div class="col-sm-8 panel panel-default">
          <div id="detail" class="panel-body">
            Nothing here yet
          </div>
        </div>
      </div>
    </div>

    <script src="/third-party/jquery/dist/jquery.js"></script>
    <script src="/third-party/bootstrap/dist/js/bootstrap.js"></script>
    <script data-main="/app/javascripts/requireMain.js" src="/third-party/requirejs/require.js"></script>
Here’s our requireMain.js which we will use to start up require:
(function() {

  requirejs.config({
    baseUrl: '',
    paths: {
      'flight': '/third-party/flight',
      'app': '/app/javascripts',
      'components': '/app/javascripts/components',
      'mixins': '/app/javascripts/mixins'
    }
  });

  require(
    [
      'flight/lib/debug'
    ],

    function(debug, main) {
      debug.enable(true);
      require(['app/main'], function(initialize) {
        initialize();
        console.log('Require started correctly!');
      });
    }
  );

})();
And here is our main.js which we use to start the application:
define(['components/dataComponent', 'components/detailComponent', 'components/listComponent'],
    function(dataComponent, detailComponent, listComponent) {

    function initialize() {
        dataComponent.attachTo(document);
        detailComponent.attachTo('#detail');
        listComponent.attachTo('#list');
    }

    return initialize;
});
Bosh. Three components attached to the DOM. Now what…
The main event
As mentioned before these components know nothing about each other and this is intentional. Components communicate to each other by listening for and triggering events. As applications get larger, care must be taken when naming events. A nice naming convention is described here.
Right then, with that swirling round our heads, let’s put some event handling and triggering in our application.
define(['flight/lib/component'], function(defineComponent) {

    // Data here
    var data = [{id: 1, name: "Fred", details:"Lorem ipsum"}];

    function dataComponent() {

        this.uiItemsRequested = function() {
            this.trigger('dataItemsServed', {data: data});
        };

        this.uiItemRequested = function(event, request) {
            if (request && request.id) {
                var selectedDatum = $.grep(data, function(datum, index) {
                    return +request.id === datum.id;
                })[0];
                if (selectedDatum) {
                    this.trigger('dataItemServed', selectedDatum);
                }
            }
        };

        this.after('initialize', function() {
            this.on('uiItemRequested', this.uiItemRequested);
            this.on('uiItemsRequested', this.uiItemsRequested);
        });
    }

    return defineComponent(dataComponent);
});

define(['flight/lib/component'], function(defineComponent) {

    function listComponent() {

        this.dataItemsServed = function(event, data) {
            var markup = '';
            $.each(data.data, function(index, value) {
                markup += "<li id=\"" + value.id + "\" class=\"list-group-item\">" + value.name + "</li>";
            });

            this.$node.html(markup);
        };

        this.selectionChanged = function(event) {
            var id = event.target.id;
            this.trigger('uiItemSelectionChanged', {id: id});
        };

        this.after('initialize', function() {
            this.on(document, 'dataItemsServed', this.dataItemsServed);
            this.on('click', this.selectionChanged);
            this.trigger('uiItemsRequested');
        });
    }

    return defineComponent(listComponent);
});

define(['flight/lib/component'], function(defineComponent) {

    function detailComponent() {

        this.dataItemServed = function(event, datum) {
            var markup = "<h3>" + datum.name + "</h3><div>" + datum.details + "</div>";

             this.$node.html(markup);
        };

        this.uiItemSelectionChanged = function(data, selection) {
            this.trigger('uiItemRequested', selection);
        };

        this.after('initialize', function() {
            this.on(document, 'uiItemSelectionChanged', this.uiItemSelectionChanged);
            this.on(document, 'dataItemServed', this.dataItemServed);
        });
    }

    return defineComponent(detailComponent);
});
Take a second to look at the events being triggered and handled and you should be able to follow the flow of the application. You should be able to follow the “event conversations” between the three components.
Here’s what happens when the application loads:
- The listComponent requests the data on startup by triggering the ‘uiItemsRequested’ event.
- The dataComponent hears this and serves up the data using the ‘dataItemsServed’ event with the data attached.
- The listComponent hears this and renders the list. Sweet!
And here’s what happens when a user clicks an item in the list:
- The listComponent fires off an ‘uiItemSelectionChanged’ event with the id of the selected item as the event payload.
- The detailsComponent hears this and sends out the ‘uiItemRequested’ event.
- The dataComponent hears this and triggers the ‘dataItemServed’ event.
- The detailsComponent is listening for this and renders the details. Hurrah!
“Hang on a second, what’s that this.after('initialize', function() {...}); bit?!” you might ask. Very astute of you. It is an example of advice and allows us to modify existing code by adding extra functionality. In our case this can be read as “after initialisation, add our event handlers and, in the case of the listComponent, trigger the ‘uiItemsRequested’ event”. The this.after('initialize', function() {...}); pattern is the most common you will use and is used to setup the component.
Mixin’ it up
Pretty neat, we have a working application. It won’t win awards… yet. But we’re about to add some logging to the console. Surely that will swing the judges. We don’t want to repeat our code again and again so what’s the answer? Mixins. Mixins are bits of code that we can make available to multiple components. Lets make our loggerMixin with a single info function:
define(function() {

    return function() {
        this.info = function(component, message) {
            console.info(component + ": " + message);
        };
    };
});
And now let’s add this bad boy to a component:
define(['flight/lib/component', 'mixins/loggerMixin'], function(defineComponent, loggerMixin) {

    // Data here
    var data = [{id: 1, name: "Fred", details:"Lorem ipsum"}];

    function dataComponent() {

        this.uiItemsRequested = function() {
            this.info('dataComponent', 'uiItemsRequested');
            this.trigger('dataItemsServed', {data: data});
        };

        this.uiItemRequested = function(event, request) {
            this.info('dataComponent', 'uiItemRequested');
            if (request && request.id) {
                var selectedDatum = $.grep(data, function(datum, index) {
                    return +request.id === datum.id;
                })[0];
                if (selectedDatum) {
                    this.trigger('dataItemServed', selectedDatum);
                }
            }
        };

        this.after('initialize', function() {
            this.on('uiItemRequested', this.uiItemRequested);
            this.on('uiItemsRequested', this.uiItemsRequested);
        });
    }

    return defineComponent(dataComponent, loggerMixin);
});
It’s as easy as including the mixin when defining the component. We now have access to the this.info function that we defined in the mixin. It’s easy to think of more complex examples where this would be very useful.
Testing times
Because components don’t depend on each other and they have a well defined API (i.e. given this event with this data, I expect that event with that data to be triggered) they are very easy to test. There are helpful libraries which extend jasmine (jasmine-flight) and mocha (mocha-flight), depending on your preference, which have additional functions for initialising components and spying on events. Here is a simple test for the dataComponent written using the jasmine-flight library:
describeComponent('component/dataComponent', function() {

    "use strict";

    beforeEach(function() {
        this.setupComponent();
    });

    it('uiItemsRequested', function() {
        spyOnEvent(document, 'dataItemsServed');
        this.component.trigger('uiItemsRequested');
        expect('dataItemsServed').toHaveBeenTriggeredOn(document);
    });

    it('uiItemRequested', function() {
        spyOnEvent(document, 'dataItemServed');
        this.component.trigger('uiItemRequested', {id: 1});
        expect('dataItemServed').toHaveBeenTriggeredOn(document);
    });
});
The this.setupComponent function must be called before you start testing and can be called with test html and options (although I haven’t needed them for this test). Very simple I’m sure you’ll agree.
Conclusion
Flight isn’t designed to take the place of AngularJS, KnockoutJS or any other MV* framework. Instead it provides a neat way to split up your code by piggy-backing on technology that we all understand (events and jQuery). It forces you to write decoupled and easily testable code. Apart from that you can structure your application as you wish.
In our simple application we didn’t have any particularly heavy lifting to do with any of the data being passed around but it’s easy to see how Flight is non-prescriptive in this sense. You could have a chart component that handles events by drawing a chart with D3. Maybe you want to use Mustache to render the event data as html? Maybe you could have a component which is described by a KnockoutJS viewmodel? Up to you.
Using Flight isn’t all hunky dory though. It’s worth noting that the community support isn’t particularly strong for Flight at the moment. Flawed metric alert: at the time of writing there are 80989 AngularJS stackoverflow questions compared with 18 Flight questions.
Another thing I found was that because it isn’t an end-to-end solution like AngularJS there was a little frustrating setup at the beginning particularly with testing. The solution generators didn’t quite work and the documentation was a little out of date but all-in-all, development was pretty painless.
I hope you would now consider using Flight in your next project. Again, the full source code can be found here.
I am a student, not a teacher so any questions/corrections/observations are more than welcome.

