
There aren’t many examples of OAuth2 working with SAML 2.0 as an authentication method on the Internet. The purpose of this post is to provide a simple implementation of these two technologies working together.
First a bit of background. Since there are many articles explaining the workings of both OAuth and SAML on their own we have provided only a brief summary of each with relevant links for reference.
Brief summary of SAML 2.0
SAML 2.0 is an XML based framework that is used for describing and exchanging security information. It can be used for Single Sign On (SSO), Identity Management and Federation.
More in depth information can be found here: SAML Technical Overview.
Brief summary of OAuth 2
OAuth 2 is an authorisation framework that enables applications to obtain limited access to user accounts. However it does not deal with authentication.
A more detailed explanation of this can be found here: An Introduction to OAuth2.
SAML 2.0 and OAuth 2 terminology
Some of the SAML and OAuth terms are for similar concepts. Below is a list that should clarify the similarities. SAML terms with OAuth equivalents in brackets:
- Service Provider (Resource Server) – This is where the resources the client wishes to access reside.
- Client – How user is interacting with resource server. E.g. web app through browser.
- Identity Provider (Authorisation Server) – The server that owns user identities and credentials.
More information found here: Choosing an SSO Strategy SAML vs OAuth2.
Why use SAML and OAuth together?
Systems which already use SAML for both authentication and authorisation and want to migrate to OAuth as a means of authorisation will be facing the challenge of integrating the two together. It makes sense for such systems to keep using SAML as it is already set up as an authentication mechanism.
The Solution
The implemented solution has the same flow as described in the following article: SAML 2.0 Bearer Assertion Flow for OAuth 2.0.

Here the Client gets a SAML bearer assertion from the SAML Identity Provider then requests an access token from the Authorisation Server using the SAML bearer assertion as proof of identity. The Authorisation Server then verifies this and passes back an OAuth token which is used by the client to access the Resource Server. In our solution we use OAuth2 Authorization Code Grant flow.
.NET Solution structure
The solution with the implementation can be found here: Download. We have intentionally used as few external libraries as possible. The aim is to have our own simplified version of all the components from the diagram above. In this way the implementation details will be clearly visible as opposed to being hidden “behind the scenes” in a library.
The solution consists of the following projects:
- Client – the application used by the resource owner to access his resources.
- Resource server – the server holding the resources.
- SAMLIdentityProvider – implementation of a SAML server; authenticates the user and issues a SAML token containing assertions about the user
- SAMLLibrary – classes and utilities for SAML; based on code from: C# SAML 2.0 Identity Provider
- AuthorisationServer – implementation of an OAuth server; authorises the client app to access the resources; based on the following post: OWIN OAuth 2.0 Authorization Server
You need to build the entire solution in order to run the demo.
User interactions
To access his resource the user goes through 6 screens. First the main Client app page provides the interface for accessing the resource.

The user clicks ‘Get Resource’, but since he has not been authenticated yet he is redirected to the SAML server to provide credentials. For this demo project we have hardcoded “user” and “password” as login details.

The credentials are validated, the user is authenticated using the federated identity (agreed between the SAML server and OAuth server) and is redirected back to the Client app.

The Client app in turn redirects to the OAuth Authorisation server in order for the user to grant permissions to the Client app to access resources on his behalf.


After the user grants permission he is redirected back to the Client app main page where he can now access the resource.

Sequence diagram and code explanation
The sequence of interactions between the different components is shown in the following diagram. (Link to bigger image: Sequence diagram)

The alternating colours indicate the set of actions that occur between the different screens the user (resource owner) sees as described in User Interactions section above.
1) The user opens a web browser (user agent) and navigates to the Client app URL issuing a GET request to the Client. The Client app returns the Main view to the user agent (ClientController.cs line 35). The user now sees the form with ‘Get Resource’ button.

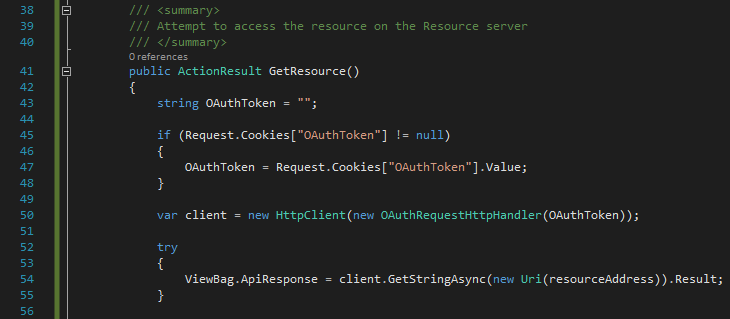
2) The user clicks ‘Get Resource’ button in the user agent issuing a GET request to the Client app. The Client app in turn tries to access the resource on behalf of the user by issuing a GET request to the Resource server. If the user is already authenticated and authorized then an OAuthToken is stored in a cookie. The Client attempts to extract the token from the cookie (ClientController.cs line 47) and adds it as a URL parameter to the resource request using the OAuthRequestHandler (ClientController.cs line 50). The GET request is then issued (ClientController.cs line 54).
As the user is not authenticated the Resource server does not receive an OAuthToken and returns Unauthorized to the Client app – this is done by the OWIN middleware. The Client app then redirects the user agent to the SAML server for authentication and includes a SAML request as a query parameter (ClientController.cs line 65).

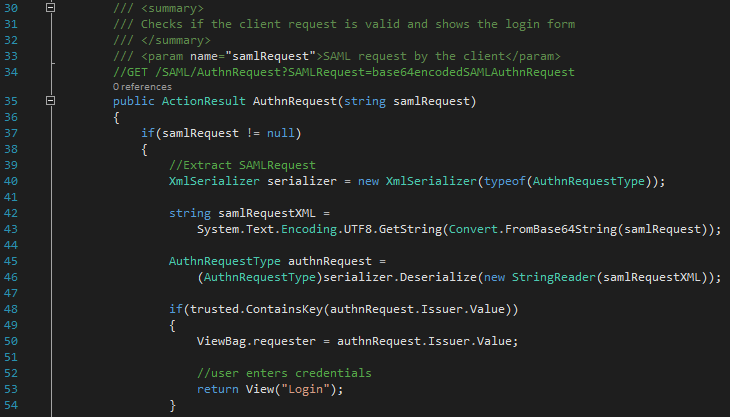
The SAML server receives the request, checks that the issuer of the SAML Request is in the list of trusted sources (SAMLController.cs line 48) and returns the Login view to the user agent. The user now sees the login form.
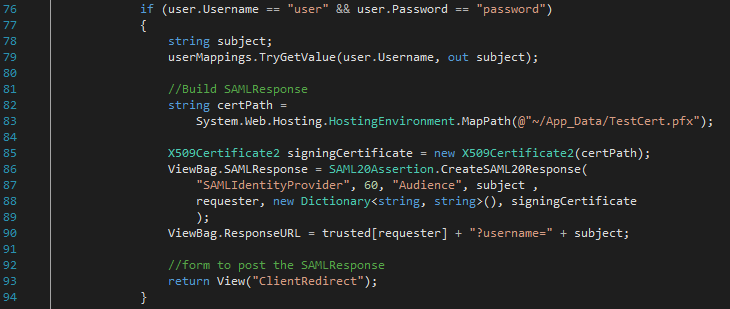
3) The user enters his credentials and clicks the ‘Submit’ button issuing a POST request to the SAML server. The SAML server checks the user credentials (SAMLController.cs line 76 – for our simple demo purposes we just use hardcoded strings) and creates and signs a SAML Response. Since the SAML response is too big to include as a query parameter the SAML server embeds it in a form and returns the ClientRedirect view to the user agent. The user now sees a “Please wait to be redirected back to the client” message.
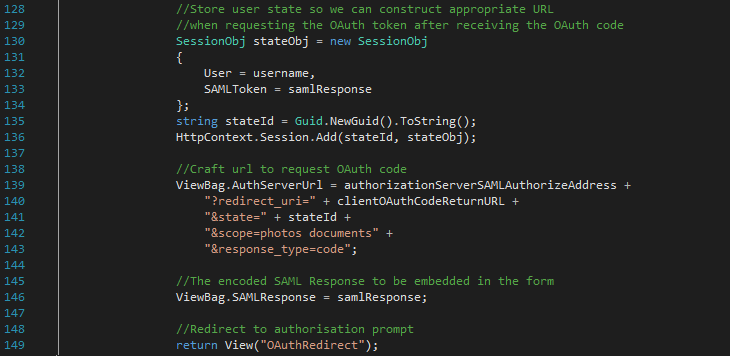
4) The user agent automatically submits the form from the ClientRedirect view using JS. This issues a POST request to the Client app with the SAML Response in the payload. The Client caches the username and SAML Response (ClientController.cs line 130), crafts the appropriate URL to the Authentication server (ClientController.cs line 139), and again embeds the SAML in a form and returns OAuthRedirect view to the user agent. The user now sees a “Successful login! Redirecting to the authorisation server” message.
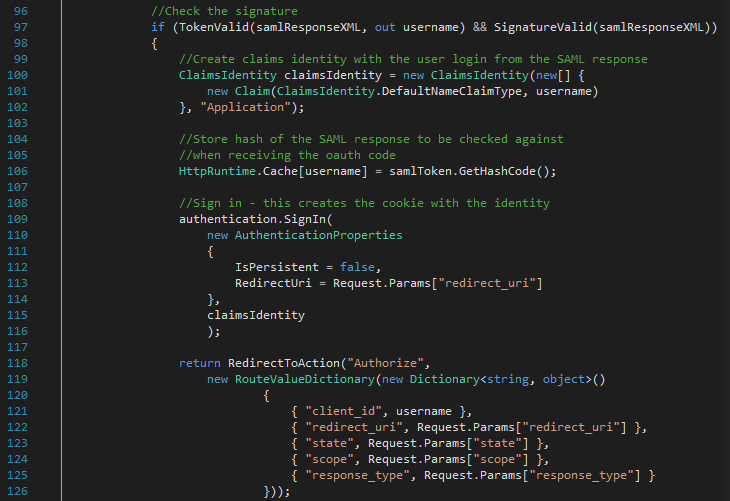
5) The user agent automatically submits the form from the OAuthRedirect View using JS. This issues a POST request to the Authorisation server with the SAML Response in the payload and a state parameter that will be used to access the user’s session back on the Client app. The Authorisation server verifies that the SAML is valid (OAuthController.cs line 97), stores a hash of the SAML response so that it can be used later for verifying the user identity (OAuthController.cs line 106), creates an application cookie identity with the information provided by SAML (OAuthController.cs line 109), and redirects the user agent to the authorisation endpoint (OAuthController.cs line 118).
The user agent then issues a GET request to the authorisation endpoint. If the user was successfully authenticated the Authorisation server returns the Authorize View. The user now sees a form that prompts them to grant privileges to the Client app.
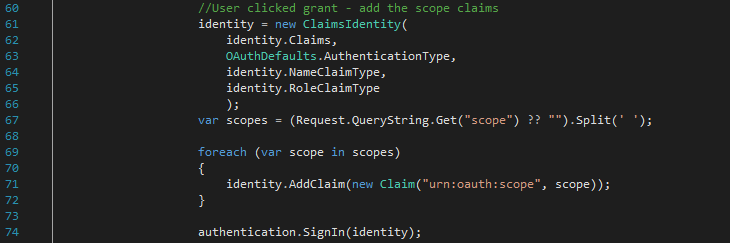
6) The user clicks the “Grant” button. The user agent issues a POST request to the Authorisation server. The Authorisation server creates a new bearer type identity for the user with all of the rights that the user authorised. (OAuthController.cs line 61).
The OWIN middleware creates an OAuth authentication code (Startup.Auth.cs line 102) and redirects the user agent to the Client app redirect URL. The query parameters include the authentication code and the state parameter provided by the Client app back in 5).

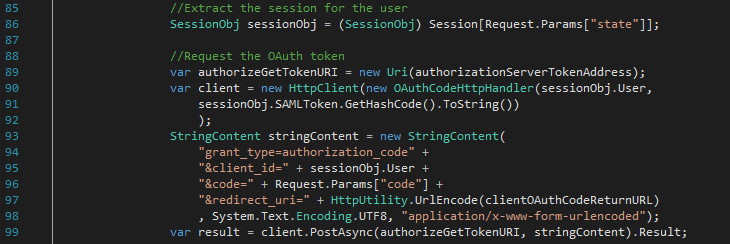
The Client app uses the state parameter to access the user’s session state (ClientController.cs line 86) and issues a POST back to the Authorisation server in order to exchange the authorisation code for an OAuth access token (ClientController.cs line 99). The request includes the username and SAML hash to be compared as means of authentication (ClientController.cs line 90).
The Authorisation server compares the provided SAML hash with the one stored in the cache to authenticate the user (Startup.Auth.cs line 86) and the OWIN middleware returns an OAuth access token to the Client app.

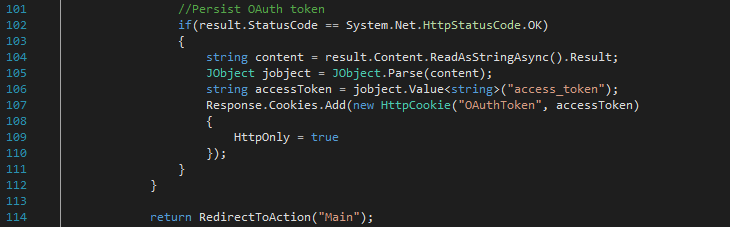
The Client app stores the OAuth access token in a cookie and redirects the user agent to the Main view (ClientController.cs line 114). The user now sees the form with “Get resource” button again.
7) The user clicks ‘Get resource’ button in the user agent issuing a GET request to the Client app. The Client app in turn tries to access the resource on behalf of the user by issuing a GET request to the Resource server (ClientController.cs line 54).

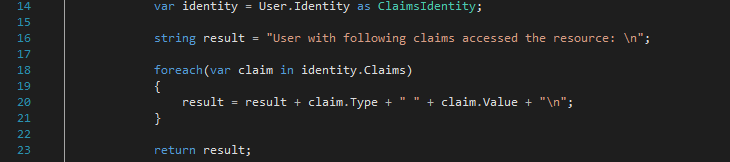
The user has already authenticated and authorized the Client app so the OAuthToken from the cookie is sent as well. The OWIN middleware on the Resource server parses the OAuthToken and sets the user identity automatically. The identity information is extracted and returned as a response to the Client app (ResourceController.cs line 14).
The Client app returns the Main view containing the response to the user agent. The user sees the response.
Summary
It is hard to find working examples of OAuth working with SAML. Hopefully this post can serve as a reference point as to what an actual implementation should include. While the provided code uses as few libraries as possible for simplicity, a real solution can make use of existing libraries such as ComponentSpace’s SAML library and DotNetOpenAuth.

