This is the second post in the series on adding security testing into your workflow using OWASP ZAP. The first blog post, Incorporate Security Testing into exploratory testing, focused on ZAP’s Passive Scanner. This type of security scanning is completely safe to do on any website since ZAP only examines the HTTP requests and responses. This makes it good at finding vulnerabilities such as missing security headers or missing anti CSRF tokens. On the other hand, ZAP’s Active Scanner is focused on finding website vulnerabilities such as SQL Injection and XSS (cross-site scripting). The Active Scanner achieves this by making malicious requests which the Passive Scanner does not do. Due to this, you should only run the Active Scanner on sites that you own.
Active Scanning
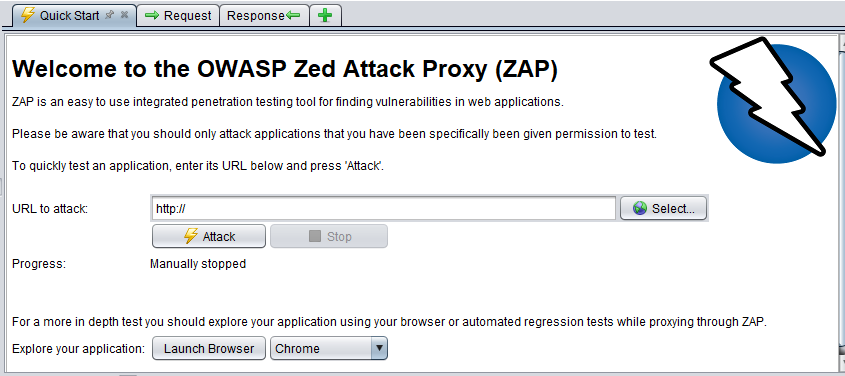
ZAP has several ways to perform an Active Scan. The most straightforward of these is to use the Quick Start welcome screen that is displayed by default when ZAP is launched.

To begin, enter the URL you want to scan in the URL to attack field, and then press the Attack button. This will launch a two step process:
- Firstly, a spider will be used to crawl the website: ZAP will use the supplied URL as a starting point to explore the website to determine all of the hyperlinks within it (links that direct outside the domain will be ignored). The Spider tab at the bottom of the ZAP window will display the links as they are found. While this is happening, ZAP will simultaneously passively scan the links.
- Secondly, the Active Scan will launch: once the crawl is complete the active scan will start. ZAP will launch a variety of attack scenarios at the URLs listed in the Spider tab. The attack progress will be displayed in the Active Scan tab.
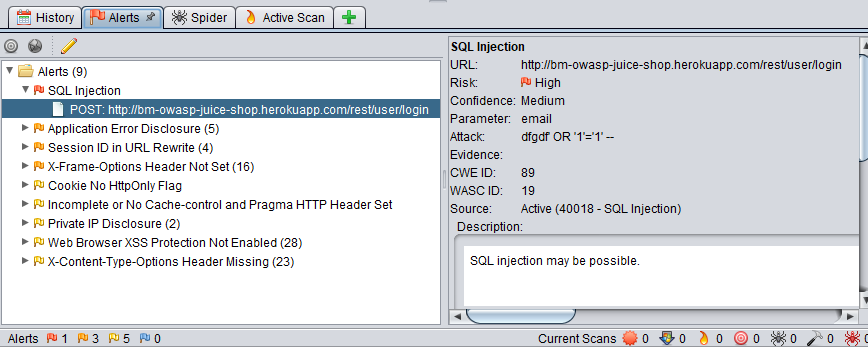
Once the active scan has finished, the results will be displayed in the Alerts tab. This will contain all of the security issues found during both the Spider and Active scan. They will be flagged according to their risk - red for High Priority, and green and yellow for Medium to Low Priority, respectively.

Depending on the size of your site, both the Spider and Active scans can take some time to perform. Fortunately, ZAP can save a session along with the results. This can be done from the File | Persist Session menu option.
If you need to share the results, ZAP can generate reports in multiple formats. To generate an HTML report use the menu option Reports | Generate HTML Report.
The above method is a simple way to obtain a vulnerability assessment of your site. It does have some limitations, particularly that ZAP does not handle authentication by default. This means that any links requiring authentication will not be found or scanned. To solve this, you can configure the Session Properties to include the login details that will allow ZAP access to the secure areas of your site.
This will be the topic of the next blog in this series.

