
The WebAssembly build of FFmpeg allows you to run this powerful video processing tool directly within the browser. In this blog post I explore FFmpeg.wasm and create a simple client-side transcoder that streams data into a video element, with a bit of RxJS thrown in for good measure.

FFmpeg.wasm
FFmpeg is most often used via its command-line interface. For example, you can transcode an AVI file to an equivalent video file in MP4 as follows:
$ ffmpeg -i input.avi output.mp4
Let’s look at how you perform the same task within the browser …
FFmpeg.wasm is a WebAssembly port of FFmpeg, which you can install via npm and use within Node or the browser just like any other JavaScript module:
$ npm install @ffmpeg/ffmpeg @ffmpeg/core
With FFmpeg.wasm installed, you can perform an equivalent transcoding entirely within the browser as follows:
// fetch the AVI file
const sourceBuffer = await fetch("input.avi").then(r => r.arrayBuffer());

// create the FFmpeg instance and load it
const ffmpeg = createFFmpeg({ log: true });
await ffmpeg.load();

// write the AVI to the FFmpeg file system
ffmpeg.FS(
  "writeFile",
  "input.avi",
  new Uint8Array(sourceBuffer, 0, sourceBuffer.byteLength)
);

// run the FFmpeg command-line tool, converting the AVI into an MP4
await ffmpeg.run("-i", "input.avi", "output.mp4");

// read the MP4 file back from the FFmpeg file system
const output = ffmpeg.FS("readFile", "output.mp4");

// ... and now do something with the file
const video = document.getElementById("video");
video.src = URL.createObjectURL(
  new Blob([output.buffer], { type: "video/mp4" })
);
There’s a lot of interesting stuff going on here, so let’s dive into the details.
After using the fetch API to load the AVI file, the following steps initialise FFmpeg itself:
const ffmpeg = createFFmpeg({ log: true });
await ffmpeg.load();
FFmpeg.wasm is composed of a thin JavaScript API layer and a more substantial (20MByte!) WebAssembly binary. The above code loads and initialises the WebAssembly file ready for use.
WebAssembly is a new performance-optimised low-level bytecode that runs within the browser. It was specifically designed as a compilation target for a wide range of languages, and a convenient vehicle from allowing existing non-browser applications to target the web.
In this case, FFmpeg is a 20 year old project, with > 1,000 contributors and almost 100k commits. Prior to WebAssembly, it would be almost inconceivable to create a JavaScript port of this library, the effort involved would be collosal! Furthermore, the performance characteristics of JavaScript might limit the effectiveness of this approach.
In the long-term we’ll likely see WebAssembly used more widely, but for now, it has found most success as a mechanism for bringing mature and substantial C/C++ codebases to the web, e.g. Google Earth, AutoCAD, and TensorFlow
After initialisation, the next step is to write the AVI file to the file system:
ffmpeg.FS(
  "writeFile",
  "input.avi",
  new Uint8Array(sourceBuffer, 0, sourceBuffer.byteLength)
);
OK, so that’s a bit odd isn’t it? To understand what’s going on here, we need to dig a little deeper into how FFmpeg.wasm is compiled.
FFmpeg.wasm is compiled into WebAssembly using Emscripten, a C/C++ to WebAssembly toolchain that was developed alongside the WebAssembly specification. Emscripten is more than just a C++ compiler - in order to ease migration of existing codebases, it provides support for a number of C/C++ APIs via web-based equivalents. For example OpenGL is supported by mapping calls to WebGL. It also supports SDL, POSIX and pthreads.
Emscripten provides a file-system API which is mapped to in-memory storage. With FFmpeg.wasm, the underlying Emscripten file-system API is exposed directly via the ffmpeg.FS function - you can use this interface to navigate folders, create files and various other file system operations.
The next step is where it really gets interesting:
await ffmpeg.run("-i", "input.avi", "output.mp4");
If you step over the above line in the Chrome Dev Tools, you’ll notice that it creates a number of Web Workers, with each one loading ffmpeg.wasm:
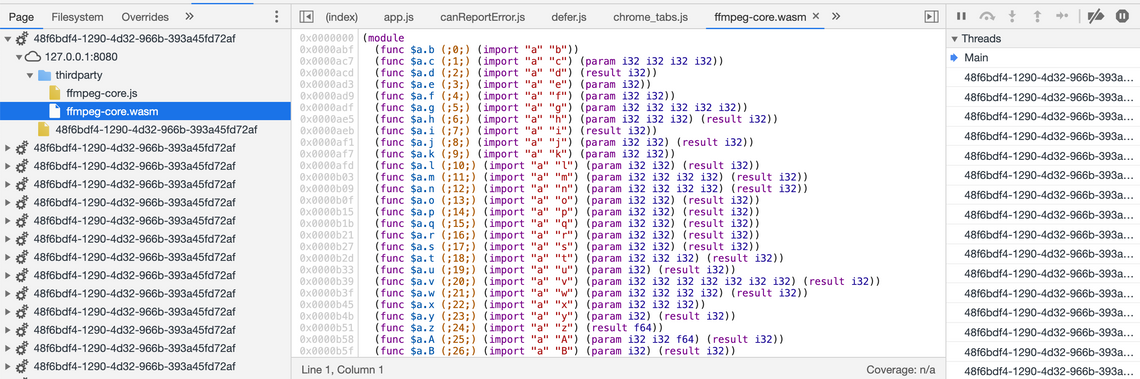
This makes use of Emscripten’s Pthread support. As we’ve enabled logging, you can see the progress within console;
Output #0, mp4, to 'output.mp4':
   Metadata:
     encoder         : Lavf58.45.100
     Stream #0:0: Video: h264 (libx264) (avc1 / 0x31637661), yuv420p, 256x240, q=-1--1, 35 fps, 17920 tbn, 35 tbc
     Metadata:
       encoder         : Lavc58.91.100 libx264
     Side data:
       cpb: bitrate max/min/avg: 0/0/0 buffer size: 0 vbv_delay: N/A
frame=   47 fps=0.0 q=0.0 size=       0kB time=00:00:00.00 bitrate=N/A speed=   0x
frame=   76 fps= 68 q=30.0 size=       0kB time=00:00:00.65 bitrate=   0.6kbits/s speed=0.589x
frame=  102 fps= 62 q=30.0 size=       0kB time=00:00:01.40 bitrate=   0.3kbits/s speed=0.846x
The final step is to read the output file and supply it to a video element:
const output = ffmpeg.FS("readFile", "output.mp4");
const video = document.getElementById("video");
video.src = URL.createObjectURL(
  new Blob([output.buffer], { type: "video/mp4" })
);
And we’re done.
Interestingly, the experience of using FFmpeg.wasm, a command-line tool with a virtual file system, feels a bit like using a docker!
Creating a Streaming Transcoder
Transcoding large files can take a little while. For a bit of fun, let’s take a look at how you can transcode the file into segments, incrementally adding them to the video buffer.
You can build a streaming media play by using the Media Source Extension APIs, which includes the MediaSource and SourceBuffer objects. Creating and loading buffers can be quite tricky, with both of these objects providing lifecycle events which you must handle in order to append new buffers at the correct time. In order to manage the coordination of these various events, I opted to use RxJS.
The following function creates an RxJS Observable based on the FFmpeg.wasm transcoded output:
const bufferStream = filename =>
  new Observable(async subscriber => {
    const ffmpeg = FFmpeg.createFFmpeg({
      corePath: "thirdparty/ffmpeg-core.js",
      log: false
    });

    const fileExists = file => ffmpeg.FS("readdir", "/").includes(file);
    const readFile = file => ffmpeg.FS("readFile", file);

    await ffmpeg.load();
    const sourceBuffer = await fetch(filename).then(r => r.arrayBuffer());
    ffmpeg.FS(
      "writeFile", "input.mp4",
      new Uint8Array(sourceBuffer, 0, sourceBuffer.byteLength)
    );

    let index = 0;

    ffmpeg
      .run(
        "-i", "input.mp4",
        // Encode for MediaStream
        "-segment_format_options", "movflags=frag_keyframe+empty_moov+default_base_moof",
        // encode 5 second segments
        "-segment_time", "5",
        // write to files by index
        "-f", "segment", "%d.mp4"
      )
      .then(() => {
        // send out the remaining files
        while (fileExists(`${index}.mp4`)) {
          subscriber.next(readFile(`${index}.mp4`));
          index++;
        }
        subscriber.complete();
      });

    setInterval(() => {
      // periodically check for files that have been written
      if (fileExists(`${index + 1}.mp4`)) {
        subscriber.next(readFile(`${index}.mp4`));
        index++;
      }
    }, 200);
  });
The above code uses the same FFmpeg.wasm setup as previously, writing the file to be transcoded into the memory file system. The ffmpeg.run has a different configuration than the previous example in order to create a segmented output, with suitable transcoder settings. When run, FFmpeg writes files with an incremental index (0.mp4, 1.mp4, …) to the mem file-system.
In order to stream the output, an interval time polls the file system for the transcoded output, emitting the data as events via subscriber.next. Finally, when ffmpeg.run completes the remaining files are emitted and the stream completed (closed).
In order to stream data into a video element, you need to create a MediaSource object, and wait for the sourceopen event to fire. The following code uses RxJS combineLatest to ensure the FFmpeg output is not processed until this event fires:
const mediaSource = new MediaSource();
videoPlayer.src = URL.createObjectURL(mediaSource);
videoPlayer.play();

const mediaSourceOpen = fromEvent(mediaSource, "sourceopen");

const bufferStreamReady = combineLatest(
  mediaSourceOpen,
  bufferStream("4club-JTV-i63.avi")
).pipe(map(([, a]) => a));
When the first video segment / buffer is received, we need to add a SourceBuffer to the MediaSource with the correct time and append the raw buffer to the SourceBuffer. Following this, there is another careful point of coordination, new buffers cannot be added to the SourceBuffer until it emits the updateend event to indicate that the previous buffer has been processed.
The following code uses take to handle the first buffer, and the handy mux.js library to read the mime type. It then returns a new observable stream from the updateend event:
const sourceBufferUpdateEnd = bufferStreamReady.pipe(
  take(1),
  map(buffer => {
    // create a buffer using the correct mime type
    const mime = `video/mp4; codecs="${muxjs.mp4.probe
      .tracks(buffer)
      .map(t => t.codec)
      .join(",")}"`;
    const sourceBuf = mediaSource.addSourceBuffer(mime);

    // append the buffer
    mediaSource.duration = 5;
    sourceBuf.timestampOffset = 0;
    sourceBuf.appendBuffer(buffer);

    // create a new event stream
    return fromEvent(sourceBuf, "updateend").pipe(map(() => sourceBuf));
  }),
  flatMap(value => value)
);
All that’s left is to append the buffers as they arrive, and when the SourceBuffer is ready. This can be achieved using the RxJS zip function:
zip(sourceBufferUpdateEnd, bufferStreamReady.pipe(skip(1)))
  .pipe(
    map(([sourceBuf, buffer], index) => {
      mediaSource.duration = 10 + index * 5;
      sourceBuf.timestampOffset = 5 + index * 5;
      sourceBuf.appendBuffer(buffer.buffer);
    })
  )
  .subscribe();
And that’s it - a bit of careful coordination of events, but ultimately very little code is needed to transcode a video, progressively adding the result into a video element.
The code for this final example is on GitHub and hosted on GitHub pages.