
When moving back from web to desktop development, it’s easy to miss the quick feedback and update cycle enabled by the developer tools in modern web browsers. To an extent the debugger intermediate window does many of the things the console allows, and many of the “script debugging” features the browser provides are based on a traditional debugger. However the display of the page DOM and related CSS properties, and the ability to inspect and manipulate these on the fly to debug and develop a design, is something that it feels hard to live without.
Snoop provides a similar utility for WPF applications - displaying the visual tree in a tree-view, allowing selection of particular elements and editing their properties at runtime. This basic operation is straightforward, though I give a few tips below.
The addition of a PowerShell console means that it’s now possible to go beyond the fixed capabilities of Snoop, and I discuss a few possibilities below, inspired by the features available in the browser.
The basics
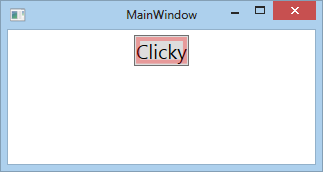
For the purpose of this article I constructed an extremely simple WPF application containing only a button. After attaching Snoop I selected the button’s content TextBlock in the element tree, giving a “selection” box around it in the application:
The corresponding Snoop properties window then looks like this:
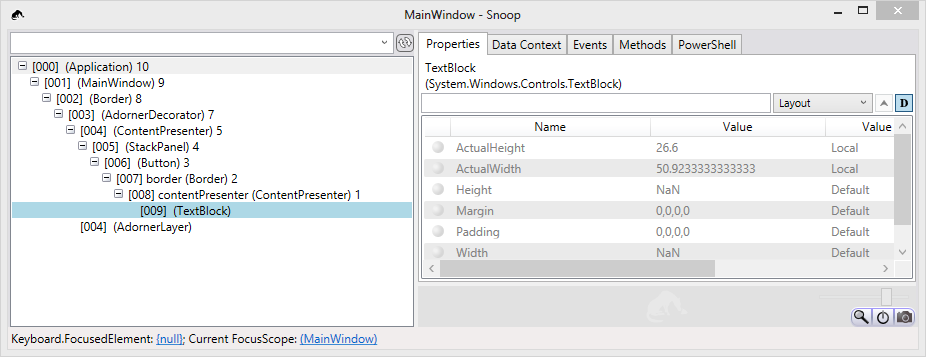
This properties window gives us the opportunity to change all sorts of visual aspects (hiding elements by collapsing their visibility, changing colours and tweaking layout margins), and drill down into the UI structure (as well as the corresponding DataContext).
Top tips
-
Similarly to the element selection tools in browser’s dev tools, an element can be selected by mousing over it and hitting ctrl+shift+click
-
After closing the snoop window for an app, or closing the app, the changes made to properties are copied to the clipboard. All those sizing tweaks and layout changes can be made permanently without having to keep running notes. This works better if your visual elements have names so you can work out which Grid you changed!
-
Remember that snoop injects itself into your application in order to work. In practise this means that if your UI locks up, the snoop UI will do so too - and vice versa. It’s also something to bear in mind in more complex situations (you do something with appdomains, non-wpf host etc). And don’t do as I did, and run snoop under Visual Studio then try to snoop the same Visual Studio instance - very confusing!
Delete visual
In WebKit dev tools, it’s possible to delete a DOM node by clicking on the element tree and selecting delete node. You can also simply hide it by changing the visibility property, and this works in Snoop too, but lets assume you actually want to remove the item.
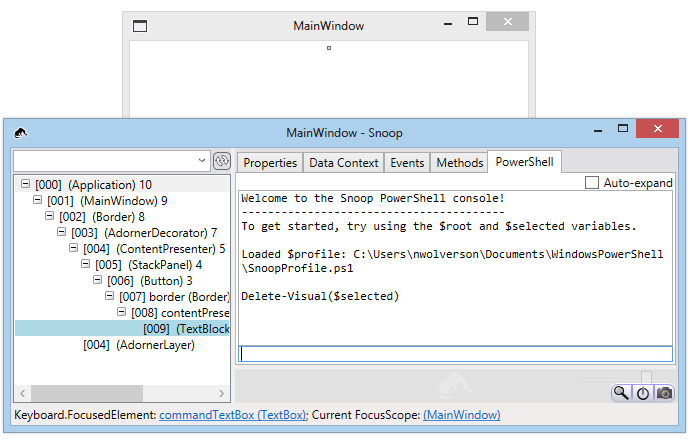
Snoop does not provide this capability, but what it does provide is the PowerShell console. Snoop provides access to the selected visual in the
PowerShell console via the $visual variable. This is a Snoop class (Snoop.VisualItem), containing links to the parent, to the visual itself, as
well as other properties such as whether the treeview is expanded.
As an example, we’ll remove the text content from our button. With this textblock selected, we note the parent is a ContentPresenter, so what we
want to do is null out its Content property:
$selected.parent.visual.Content = $nullIf you’re following along you’ll note that the WPF application immediately updates, the button becoming empty, but the Snoop tree view does not - hitting refresh will rebuild the tree view from the current visual tree.
In this case we knew that the parent was a ContentPresenter - more to the point it was a ContentControl, so had the Content property. There are
a couple of other common possibilities - a Decorator like a Border, which has a Child property, and a Panel which has a Children property. So we
could do this:
function Delete-Visual($item) {
	$parent = $item.parent.visual
	if ($parent.Content) { $parent.Content = $null }
	if ($parent.Child) { $parent.Child = $null }
	if ($parent.Children) { $parent.Children.Remove($item.visual) }
}

Delete-Visual($selected)
And voilà (note that the Snoop tree view needs to be refreshed to reflect the updated UI):
Add visual
Again in WebKit dev tools, you can edit an item as HTML. This lets you change properties, which is functionality covered by the property editor, but also add new elements by writing the HTML directly.
Again we can use the PowerShell console to add elements. To do this we’ll use the New-Object cmdlet to create an object, and then add that to
the appropriate container.
$tb = new-object System.Windows.Controls.TextBlock
$tb.Text = "Hi!"
$button = new-object System.Windows.Controls.Button
$button.Content = $tb
$selected.visual.Children.Add($button)
In fact we can rewrite this by passing properties inline as a dictionary (and omit the unnecessary TextBlock):
$button = new-object System.Windows.Controls.Button -property @{ Content = "Hi again" }
$selected.visual.Children.Add($button)
I think this is pretty cool, but I have to admit it’s a little awkward for a C# developer without much of a handle on PowerShell, both in terms
of unfamiliar syntax and requirement to specify namespaces. This is particularly true when scaling up from this toy example to adding a more
interesting set of visuals. Instead, we could just write some XAML to define the elements being added, via XamlReader.Parse. This works as
follows:
[System.Windows.Markup.XamlReader]::Parse(
	'<Button xmlns="http://schemas.microsoft.com/winfx/2006/xaml/presentation" Content="TestButton" />')
Unfortunately the namespace is required making this rather clunky. We can improve this by constructing a context with default namespace included. The following function does that:
function Add-Visual([string]$xaml, $root = $selected.visual) {
	$pc = (new-object System.Windows.Markup.ParserContext)
	$pc.XmlnsDictionary.Add("", "http://schemas.microsoft.com/winfx/2006/xaml/presentation")
	$element = [System.Windows.Markup.XamlReader]::Parse($xaml, $pc)
	$root.children.add($element)
}
So now we can do this:
Add-Visual('<Button Content="TestButton" />')Extending the snoop UI
The above functions are generally applicable, so you might want to make them available for future sessions without typing them in again. For
this, Snoop supports a PowerShell profile in SnoopProfile.ps1.
However what we can also do is enhance the Snoop UI itself via its PowerShell console. I found some of this turned out to be surprisingly easy (because snoop is handy and PowerShell allows one to be somewhat lax in types etc), and other things surprisingly hard (because PowerShell has some weird scoping rules and makes it hard to create a closure).
Snoop exposes its UI root via $snoopui. So with a helper to enumerate visual trees (directly rather than via Snoop’s model of the target’s visual tree), we get can grab the visual elements for the Snoop treeview - after snooping snoop itself to find out the structure.
function Get-TreeItems {
	Get-VisualChildren $snoopui |
		? { $_.GetType().Name -eq "ProperTreeViewItem" }
}
In order to add a context menu to these items, we’re going to associate a command with the menu item, which will run some Powershell code.
Without referencing some existing library, what I’ve done here is create a simple DelegateCommand by using PowerShell’s ability to define C#
code inline:
Add-Type @"
    public class DelegateCommand : System.Windows.Input.ICommand
    {
        private System.Action<object> _action;
        public DelegateCommand(System.Action<object> action)
        {
            _action = action;
        }

        public bool CanExecute(object parameter)
        {
            return true;
        }

        public event System.EventHandler CanExecuteChanged = delegate { };

        public void Execute(object parameter)
        {
            _action(parameter);
        }
    }
"@
We define a list of menu items, each of which is a dictionary containing name + command. We can then iterate over all tree items, create a context menu, and attach it to each item, much as we might do in C#.
function Set-ContextMenu() {
	$menuItems = ( @{Item="Add Child Element";Command = New-Object DelegateCommand( { Add-XamlVisual } ) },
		@{Item="Delete";Command = New-Object DelegateCommand( { Delete-Visual } ) } )

	Get-TreeItems | % {
		$menu = (New-Object System.Windows.Controls.ContextMenu)
		foreach ($menuItem in $menuItems) {
			$item = New-Object System.Windows.Controls.MenuItem
			$item.Header = $menuItem.Item
			$item.Command = $menuItem.Command
			$menu.Items.Add($item) | Out-Null
		}
		$_.ContextMenu = $menu
	};
}
As for the commands, Delete-Visual was discussed above, but Add-XamlVisual is a little interesting. Based on the XAML parsing mentioned earlier,
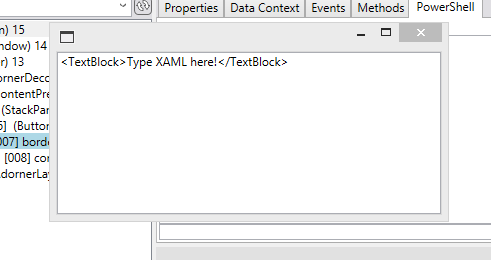
we write a simple function to pop up a modal dialog to ask for some XAML input
function Query-Xaml()
{
$w = new-object system.windows.window
$w.content = new-object system.windows.controls.textbox
$w.content.text = "<TextBlock>Type XAML here!</TextBlock>"
$w.showdialog() | Out-Null
$w.content.text
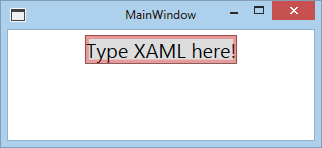
}And use this to add as a child of the selected item (one way or another):
function Add-XamlVisual()
{
$xaml = Query-Xaml
Add-Visual($xaml)
}
function Add-Visual([string]$xaml, $root = $selected.visual) {
$visual = Create-Visual $xaml
try {
$root.children.add($visual)
} catch { }
try {
$root.child = $visual
} catch { }
try {
$root.content = $visual
} catch { }
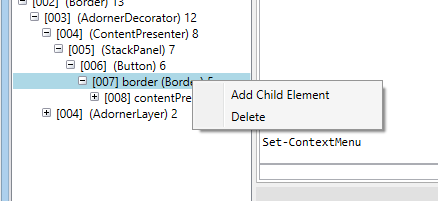
}We can then run the Set-ContextMenu command in the PS console to apply the context menu to the Snoop tree view:
This opens an editing window:
And updates the snooped application:
A final tip
I have one final Snoop/PowerShell tip, which is that its utility is far more general than described here. For instance, I had a situation recently where a WPF program was in an error state and I wanted to find out what was wrong. Attaching a debugger should give one the tools to investigate, however there is a huge limitation to the Visual Studio intermediate window - only expressions can be evaluated, and no lambdas are allowed. This makes it very hard to work with collections, for example to find the elements of a list which have some property in an error state.
It’s possible to do this with a short bit of PowerShell in Snoop. Lets say we have selected an ItemsControl and the datacontext elements have an IsError property
(admittedly a simplification). If we want to list them by Name property:
$items = $selected.visual.itemssource
$items | ? { $_.IsError } | % { $_.Name }
This just lists items to the console, but you could easily perform modifications.
If you want to go searching for some element by property more widely through the visual tree, check out the Find-By function
(also see convenience versions Find-ByName and Find-ByType).
Wrapping up
Snoop is a great tool, and I can no longer imagine WPF development without it. You may not be sold on PowerShell in general, but the PS console does make a powerful addition to Snoop, both for extension as discussed in this article and general utility.
My one annoyance in writing this post was the lack of tab-completion in Snoop’s PS console - so I will be contributing a patch for this shortly. The functions described above are part of my Snoop PowerShell profile available here.

