
With an objective of building some docker images on cloud CI infrastructure, I’m going to introduce one build-template sledgehammer I’ve been using recently: multi-stage docker builds running in a docker-in-docker host container. I’ll give examples of AWS CodeBuild and Gitlab CI, muse on some other options, and discuss caching.
TLDR: multi-stage docker build with docker-in-docker and layer caching on your CI.
Ye olde CI build
My mental image of a “traditional” CI build process looks something like this:

To restate the obvious, a build machine (bare metal or maybe a VM) runs some shell commands which perform build steps (actual compilation, etc - I’m omitting all the other aspects of CI aside from producing an actual artefact, like testing), and produces some packaged build artefact. The build machine has build tooling installed on it directly, which in a world where everyone uses the same tool in the same version is just fine, but in reality you eventually find yourself having a protracted debate with the gods (or perhaps server admin) about installing the right version of the right tool with the right dependencies without breaking everything else.
Flashback over. Anyway in the new world where I’ve decided to produce a Docker image as my output artefact this looks like this (I’ve decided to represent steps in the process that involve running docker as 3d boxes, regardless of whether they consist of building an image or just running a container as part of a build - hopefully it should make sense as we go):

Now with more cloud
Fast-forward, we have snazzy cloud CI providers and we’re committing and versioning our build config with our code (tell me you are). CI providers are offering containerized solutions, which are great to allow us to build in pre-configured environments with all the right setup. But actually, we immediately run into a problem when we want to build a Docker container as part of our build, the docker command needs to connect to a Docker server to spin up a container. There are a few options, quite well elaborated by Gitlab’s documentation on the matter:
- Use a non-container executor (i.e. a traditional VM running a shell with your build script)
- Use docker-in-docker
- Use docker socket binding
I’d say that (3) is probably the approach I’d take if I wanted to do this kind of thing locally, whereas (1) likely works well but has a bit of a dependency on your CI system. I’m going to argue for (2) as an option that’s supported across CI environments with probably fewer changes. There are some comments floating about that (3) may lead to some flakiness or concurrency issues in some CI environments, so bear this in mind.
So again repeating the above diagram in this new world, we have:

if we want to build a base image with our chosen tools, or

if we’re lazy and install them as part of the build (slower, but avoiding the hassle of building different base images).
The sledgehammer
Neither of the previous options resolves the PITA of tool setup. Depending on the popularity and painfulness of your ecosystem, you may or may not care about this. But to choose a one sledgehammer for all nuts, I’ve started using the following strategy:

To break this down, we have a docker-in-docker build executor, and inside it we’re running a multi-stage docker build, a feature from Docker 17.05+ that lets us use a chain of build containers to build our resulting artefact container. The simplest version of this without multistage-build is just building your artefact as part of the deployment image, but in many cases this will leave you with a large image to deploy containing unnecessary build tools (really, who wants to deploy their compiler/toolchain to production?).
An example
I’m going to use a Rust webserver hello-world as an example application image, for a few reasons, including:
- While a front-end web project or arbitrary tool might be deployed in a container, a web service of some kind is a more typical example
- I don’t have any Rust tooling on this machine, and it’s less likely that J. Random. Server has an image with build tools available (and if Rust is too popular, you can imagine your hipster tech of choice)
- In this case we definitely don’t want to deploy an image containing our build tools, as this weighs in at a hefty 1GB+
I’ve copied in a hello-world example with the Rocket framework, and my multi-stage Dockerfile is as follows:
FROM rustlang/rust:nightly AS build

WORKDIR /usr/src/app
COPY . .
RUN cargo build --release

FROM debian:stretch AS package
COPY --from=build /usr/src/app/target/release/hello_build ./

EXPOSE 8000
ENV ROCKET_ADDRESS="0.0.0.0"
CMD ["./hello_build"]
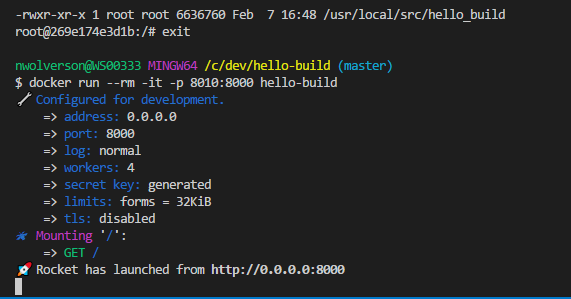
Then, the last/real reason I chose this example: when I build and run it, the output is pretty cool:
With Gitlab
This is as simple as using an image with docker in it, adding the docker:dind service (service is a Gitlab concept that essentially means a linked docker container), and running docker, I’ll reproduce the build file (which also pushes to Gitlab’s own container registry) here:
image: docker:latest
services:
  - docker:dind
variables:
  DOCKER_DRIVER: overlay2
  IMAGE_TAG: $CI_REGISTRY_IMAGE:$CI_COMMIT_SHA

build:
  stage: build
  before_script:
    - docker login -u gitlab-ci-token -p $CI_JOB_TOKEN $CI_REGISTRY
  script:
    - docker build -t $IMAGE_TAG .
    - docker push $IMAGE_TAG
With AWS CodeBuild
I set up a custom Docker image on AWS CodeBuild following these instructions, because the docker version used in the default image was rather old, not supporting multi-stage builds. Happily, as of a month or two ago the version has been updated, the default image aws/codebuild/docker:17.09.0 can be used.
(The AWS-provided aws/codebuild/docker image contains the AWS CLI tools plus essentially the docker:dind image, as opposed to being equivalent to the plain docker image which contains the client only)
Then really there is nothing to do, here is a build spec that builds (though doesn’t push) my image:
version: 0.2
phases:
  build:
    commands:
      - docker build -t hello-build .
With CI environment X
Obviously I’m not about to provide an exhaustive list here, but I’d recommend starting with the official docker:dind image as a base.
Local building, caching issues
There’s a big issue with building your application inside a Docker container, as opposed to a traditional build server with some sort of persistent environment - dependencies are not cached (typically/by default), leading to repeatedly downloading (and maybe building) the world.
Let’s break down the 3 types of build I would run regularly, because I think it’s important to distinguish how hard this hits.
- Continuous local development. Typically some kind of file watcher or IDE driven process, giving immediate feedback on errors, driving IDE assistance, launching locally perhaps under a debugger, etc. This is typically quite different to anything that happens on a build server, it might be building in unoptimised or debug modes, compiling incrementally, whatever is fastest - and typically running directly on a machine rather than containerised.
- “Full” local build. It’s important to be able to build using the same process as real releases on your build server, for me this means building using the same Dockerfile as above
- CI build. Self-explanatory?
For me the first place that download-the-world hits is case 2, so lets consider that first. How should we cache dependencies? With a separate build container
(see the next section), one might mount a local volume in the container where dependencies are installed - e.g. in a node project, your node_modules folder. Then we hit the faster case where the install finds that dependencies are already present, and moves on. However this is not possible in a multi-stage docker setup, it is not possible to mount volumes in the intermediate containers.
Layer caching
What we can do instead is leverage Docker’s layer caching instead. For every layer in a docker image which modifies the file system, the resulting layer is cached in the local registry, and reused if there are no changes (though it’s crucial to understand for a RUN that modifies the file system, the cache is used so long as the command doesn’t change, even if the results would for some reason have been different).
Unfortunately the Dockerfile I showed above has a big flaw, the COPY . . line means that as soon as any file has changed in the project, the cache will be discarded as the layer has changed, leading to the RUN cargo build --release being executed again. What we must do is split out the process of pulling in dependencies from the build itself, so that we can cache the former.
Step 1 is to copy only the manifest that specifies our dependencies, in the case of Rust Cargo.toml, and pull in (and build) those. cargo won’t build an empty project but we can trick it:
COPY Cargo.toml .
RUN mkdir -p src && echo > src/main.rs "fn main() {}"
RUN cargo build --release
In step 2 we just copy the actual source code in and build the app itself:
COPY src/ src/
RUN cargo build --release
For Rust this process is discussed here in slightly more detail, but the same works for other settings:
- For
node, copy inpackage.json(and lockfile if present), runnpm ifor that, then copy the application code itself in - For Java Maven projects, copy in the
pom.xml, usemaven-dependency-plugin’sgo-offline(along with some annoying tricks to change the dependency location away from a volume) - see here
CI layer caching - container registry
With a docker in docker executor, layer caching does not work, as the docker machine which has the individual layers cached is ephemeral - the layers of the executor image are cached, but this is of little use. (CircleCI apparently has a solution to this issue for premium users on request+fee.)
Instead we can use an previously built docker image as source of cached layers, using --cache-from to specify an existing built image from our registry. There are some complications when it comes to multi-stage builds, namely that individual stages must be pushed to the registry to obtain their layers (which are not present in the final result image). Discussion of this can be found on this Github issue.
We can update the build script from before:
script:
  - docker pull $BUILD_IMAGE_TAG || true
  - docker build -t $BUILD_IMAGE_TAG --cache-from $BUILD_IMAGE_TAG --target build .
  - docker push $BUILD_IMAGE_TAG
  - docker build -t $IMAGE_TAG  --cache-from $IMAGE_TAG --cache-from $BUILD_IMAGE_TAG .
  - docker push $IMAGE_TAG
This builds and pushes the intermediate build image to the container registry, and uses the previously built images (if they exist) as a source of cached layers. This does mean that there is additional time spent pulling those images, and not only does the first build (of a branch/etc) not benefit from this but will take longer due to uploading the image. However it does seem that the repeated builds are genuinely much faster even so, in this example something from 5-10 minutes down to 1.5.
One could object that we’ve lost the benefit of the multi-stage build here as we’re building the builder stage explicitly, but I think there are some advantages to doing it this way - locally you can just build the multi-stage docker image and get the same artefact, rather than having to run some script to run the builder image first, and if you do screw any of these fiddly steps up you don’t compromise your build, it just loses the benefit of caching.
CI layer caching - file cache
Instead of using a registry, we might consider using the built in CI caching mechanism - most CI providers will give some way of caching part of the filesystem, and we can dump a docker image into this with docker --save. Again sticking with the Gitlab example, we can try:
cache:
  key: "$CI_COMMIT_REF_NAME"
  paths:
    - cache

build:
  [...]
  script:
    - docker load -i cache/images.tar || true
    - docker build -t $BUILD_IMAGE_TAG --cache-from $BUILD_IMAGE_TAG --target build .
    - docker build -t $IMAGE_TAG  --cache-from $IMAGE_TAG --cache-from $BUILD_IMAGE_TAG .
    - docker save $BUILD_IMAGE_TAG $IMAGE_TAG -o cache/images.tar
    - docker push $IMAGE_TAG
I’ve tested this, but it seems that in the case of Gitlab, the caching process is in fact much slower, tripling the time of my cached build over using the registry, but maybe if your CI cache is faster and/or your registry is slower (in particular not on the same network) this could be a useful option.
Alternative: builder pattern
I’m assuming multi-stage docker builds grew out of a common practice, to set up one container for building in, copy the code out of that, into your deployment container. Obviously this is still possible:

For me now this is a tool to keep for 2 scenarios, either using an old version of Docker, or where the multi-stage build is failing you, for example because you really do need to mount a volume at the build stage.
(It should be noted that for the docker-in-docker case there’s still the same issue around caching separate from multi-stage builds, it’s just that --cache-from is less annoying to implement).
Alternative: pipeline with dind stage
If your CI infrastructure supports builds with multiple stages, running under separate containers, you could split things up a bit:

This is essentially the builder pattern but running as multiple CI stages instead of within one stage - the local directory mounted as a volume by the build container is passed as dependency/artefact between build stages.
Conclusion
I’m not going to suggest that this approach is a one-size-fits-all strategy for building anything anywhere, but for a containerized build producing a Docker image, without catering too much to language or CI infrastructure specifics, I think this is at least my new default strategy.
A project containing the example and build process discussed above is available here.
