
So mostly for entertainment sake and to see how easy it would be, I wondered if I could create a Python-based lambda in AWS using GitHub and Visual Studio Online. So, let’s see how this goes and how long it takes …
Pre-Requisites
For this little experiment, you will need:
- A GitHub account
- An Azure account
- An AWS account
Set Up the Development Environment
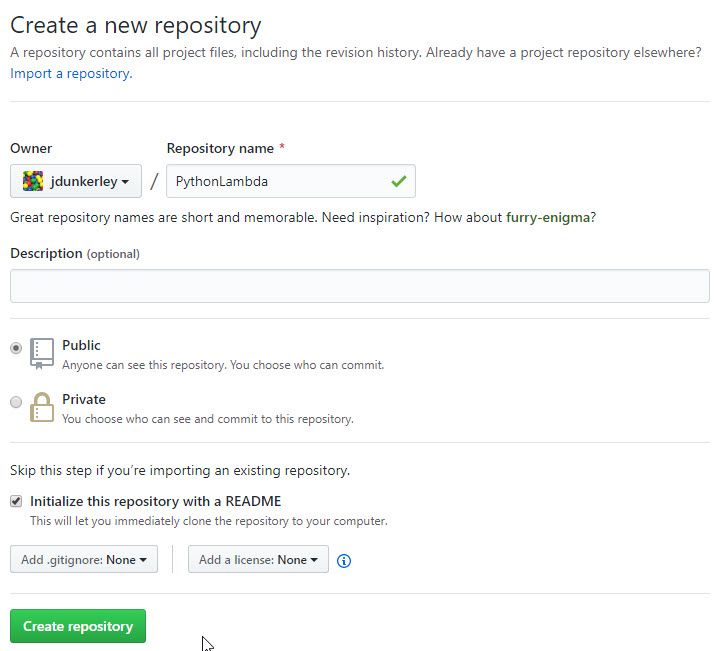
Let’s create an empty repository in GitHub as we need somewhere to keep code! Go to https://github.com/new and create a new repository, I called mine PythonLambda. I made it public and with a README (so not empty to start).
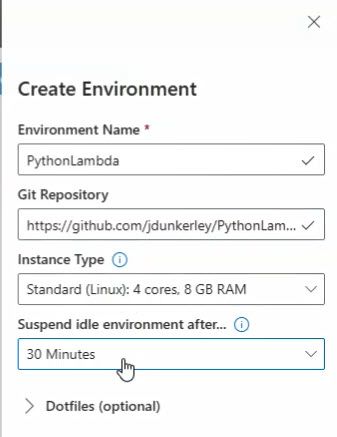
Next hop over to Visual Studio Online and click get started. You will then need to log in using your Azure account. Then click Create Environment. Enter in a name (I chose the same as the GitHub project) and then paste the URL for the GitHub repo into the Git repository. Click create and wait for it to be available.
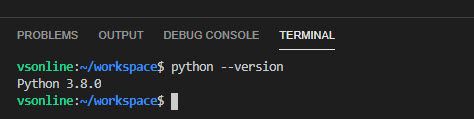
Next, connect to the environment. A window that looks remarkably like Visual Studio Code will appear; I chose to install support for Python. This took virtually no time whatsoever. Next hit Ctrl-' to open the terminal windows. Let’s check for python by running python --version:
On to installing the AWS CLI. Simply run the command pip3 install awscli --upgrade --user. Once this completes you can run aws --version:

So now we have a working development environment. Took about 3 minutes to set this up. We have a git repository, a copy of Visual Studio Code set up to write python code and the AWS CLI.
Logging into GitHub and AWS
Next, we can edit the README and check we can push back to GitHub as a new branch. Change the README file and save it. You can then go to Source Control tab (press Ctrl-Shift-G), commit the files and push to GitHub. It will pop up a window asking you to authorise microsoft-vs to access your GitHub account. After that, it will push the code to GitHub.
Next head to the AWS IAM console and log in. Ideally, you will create a new user but for the sake of simplicity, I will just create a new access key. Go to the Users link, find your user, go to Security Credentials and select Create Access Key. Back within the terminal in Visual Studio Online run aws configure and copy the Access Key ID and Secret Access Key into the prompts.
This step took me about 5 minutes. So, we are ready to start building the lambda in about 10 minutes.
Make a Python Lambda and Publish
The goal of this post is not really the Lambda more just to get it all set up. The code below is a really trivial function. Create a new file called lambda.py and add the new content:
from datetime import datetime
import logging

logger = logging.getLogger()
logger.setLevel(logging.INFO)

def lambda_handler(event):
    logger.info(event)

    return {
        'statusCode': 200,
        'body': datetime.now().isoformat()
    }
This is a very simple function which will log whatever is passed to it and return the servers current date.
The bare minimum we need to do for a lambda to run is to create an IAM role and policy, and then we can publish a function. Run the following within the terminal:
lambdaName='PythonLambda'
account=`aws sts get-caller-identity --output text --query 'Account'`
region=`aws configure get region`

# Create Role
aws iam create-role --role-name $lambdaName --assume-role-policy-document "{\"Version\":\"2012-10-17\",\"Statement\":[{\"Effect\":\"Allow\",\"Principal\":{\"Service\":\"lambda.amazonaws.com\"},\"Action\":\"sts:AssumeRole\"}]}"

# Create Policy and Attach
aws iam create-policy --policy-name $lambdaName --policy-document "{\"Version\": \"2012-10-17\",\"Statement\": [{\"Effect\": \"Allow\",\"Action\": \"logs:CreateLogGroup\",\"Resource\": \"arn:aws:logs:$region:$account:*\"},{\"Effect\": \"Allow\",\"Action\": [\"logs:CreateLogStream\",\"logs:PutLogEvents\"],\"Resource\": [\"arn:aws:logs:$region:$account:log-group:/aws/lambda/$function:*\"]}]}"
aws iam attach-role-policy --role-name $lambdaName --policy-arn "arn:aws:iam::$account:policy/$lambdaName"
This will create the Role and Policy for the lambda to use. Finally, lets publish the first version of the lambda. In the terminal, run:
zip lambda.zip lambda.py
aws lambda create-function --function-name $lambdaName --runtime "python3.7" --handler "lambda_handler" --zip-file fileb://lambda.zip --role "arn:aws:iam::$account:role/$lambdaName"
rm lambda.zip
Finally, we will set up a build task to publish this to AWS. Create a new folder called .vscode and add a new file called tasks.json. Add the following content:
{
    "version": "2.0.0",
    "tasks": [
      {
        "label": "Publish Lambda",
        "command": "zip lambda.zip lambda.py && aws lambda update-function-code --function-name PythonLambda --zip-file fileb://lambda.zip && rm lambda.zip",
        "type": "shell",
        "group": {
          "kind": "build",
          "isDefault": true
        }
      }
    ]
}
Now if you hit Ctrl-Shift-B within the editor, it will zip and deploy the python code as it stands to AWS.
Wrapping Up
Visual Studio Online is amazing. You can get a development environment up and running in minutes. It works anywhere and can easily be hooked into whatever you like. While this post has only created a very basic set up, it is hopefully enough to show you how you could do everything from the comfort of your own browser and in very little time.
This post was also published on my own personal blog - jdunkerley.co.uk

