
This post explores what makes agentic loops (where AI iteratively tests, debugs, and refines its own code) so powerful via a hands-on experiment: implementing a complete flexbox layout algorithm in just 3 hours by giving an AI agent the right feedback mechanisms and letting it work autonomously. Along the way, I share thoughts about designing effective loops, coaching agents through iterations, and when this approach works best.
This journey started a few days ago when I read a post by Emil Stenstrom, which described how he had built a no-dependency Python HTML5 parser, leaning heavily on coding agents. Not only was he able to build the parser quickly, it was more accurate than many other implementations, scoring a perfect 100% on the reference test suite.
An impressive results, especially given the following quote:
After writing the parser, I still don’t know HTML5 properly
Emil’s post is an excellent example of the power of agentic loops.
What is an agentic loop?
Pre-2025 when using LLMs to write code we were reliant on their ability to emit working code in a single pass (one shot) based on a prompt and additional context. As LLMs have become more advanced they can often emit 10s or 100s of lines of code and get it right first time, however, the more code you ask them to ‘one shot’, the more likely it is to be wrong. Furthermore, in unfamiliar or complex domains this limit is reached sooner.
How much code can you write in your editor and be sure that it is correct without running it? Personally I’d struggle to get beyond 5 lines of code - I’m very impressed by the ‘one shot’ ability of LLMs.
An agentic loop is where you supply a reasoning LLM with a goal, provide it with tools that allow it to evaluate its progress towards that goal, then allow it to iterate until the goal is eventually met.
The advantage of an agentic loop, versus one shot, should be quite obvious. It directly mimics the way that we work when developing software. Think, write code, execute, verify (optionally debug) then repeat.
Simon Willison considers designing agentic loops to be a critical skill. I very much agree.
Implementing flexbox
I was eager to gain first hand experience in creating agentic loops, but rather that write an HTML parser I wanted to find a different problem to tackle.
Casting my mind back 10 years ago, to the keynote for React.js Conf, I recall the talented Christopher Chedeau (AKA Vjeux) describing how he had created a pure JavaScript implementation of the flexbox layout algorithm for use in React Native. His approach, described as ‘extreme TDD’, was to generate a comprehensive test suite using the browser’s layout engine to create the expected values. Using this technique he was able to create a working implementation in two weeks - a feat which received a round of applause.
I decided to repeat this experiment, relying on agents, and agentic loops, as much as possible. I made use of GitHub Copilot (in Agent mode) using Claude Sonnet 4.5, giving it permission to execute specific commands, thereby allowing it to run autonomously.
The plan and the seed
My first step was a simple prompt asking an LLM to build an incremental plan for my layout engine. I also asked it to ensure that the first increment was as simple as possible. The generated plan started with “Single-line, row-direction, fixed-size items” and 9 further increments.
In order to create an agentic loop you need some sort of seed, a codebase that the agent can execute and evaluate. I was confident that the first increment is simple enough that the LLM could get it right as a one shot implementation, so I prompted as follows:
This module implements flexbox layout. It should expose a function that implements the algorithm outlines in
#file:plan.md- specifically the ‘very simplest first iteration’
This created a ~10 line layout algorithm and an accompanying test suite that passed first time. A good starting point.
The reference implementation
For this project the most valueable feedback loop is to compare the layout algorithm with a reference implementation from a browser.
I want to ensure that the test suite can be executed against both my layout algorithm and the browser. So I prompted as follows:
Create a separate test suite that validates the test cases using a browser engine
Finally, I wanted a tool that would allow the agent to quickly execute the browsers layout engine directly:
Create a script that can be run on the command line that uses the same techniques as
#file:layout-browser.test.jsto run the layout algorithm in a headless browser, but in this case take the input node tree via stdin, and output the layout via stdout
Creating the loop
The project now has:
- A trivial implementation of the flexbox algorithm
- A small test suite, with JSON files describing the input and expected layout
- The ability to run these tests against both the current implementation and a browser (reference implementation)
- A command line tool that provides a simple mechanism for running the browser’s flexbox layout
With these component parts, I have enough to create a loop. I prompted the agent as follows:
I would like you to incrementally and autonomously implement the layout engine, as detailed in the
#file:plan.md- but first, let’s write a copilot instructions file that details the process. When asked to implement an increment first build a suitable test suite (in a separate file), validating that it works using the#file:browser-layout.jscommand line tool to extract the layout as generated by a browser (our reference implementation). Once a suitable test suite has been created and validated, implement our layout engine in#file:layout.js- again testing and bug-fixing iteratively. Only stop when all tests pass.
It generated a ~250 line copilot-instructions.md file (see this commit), outlining the above approach together with the increments from the plan. With a few very minor tweaks I was happy with the result.
And it of course asked if it should start executing the plan.
Increment #1 (Single-line, row-direction, fixed-size items)
Yes, begin the process - but just for increment 1. I know this is complete, but I would like you to expand the test suite and also formally follow the implementation process, validating with the ground truth implementation
As expected, it generated some additional test cases. However, it didn’t conform to the pattern outlined above, input and expectations were embedded within the tests themselves and it had’t validated the expected output via a browser.
Via prompting I updated the Copilot Instructions file to provide more detail and specificity. Re-running increment #1 I could see that it was creating tests, validating them against the reference implementation (browser), then executing them against the layout algorithm that was being developed.
Increment #2: Basic main-axis distribution
Adding support for justify-content, container padding and item margins.
Proceed to implement increment 2
Clearly I’ve grown tired of saying ‘please’!
Once again I observed the agent creating a suite of tests (around 20), with good first guesses at the expected values. It then used the command line tool for running these tests against a browser, updating any changes in expected values. Interestingly, rather than execute the tool 20 times, it wrote a script that performed this as a single ‘bulk’ operations. Clever agent!
After implementing the required changes to the algorithm, it struggled to make the tests pass, correctly identifying the root cause which was a rounding / precision issue. It gave me various options for resolving this, I opted for an approach where ‘approximately equal’ was considered good enough.
Increment #3: Flex growth and shrink
Proceed to implement increment 3
Once again, it executed my agentic loop. However, I observed something interesting happening on this iteration. The agent iterated perhaps 10 times before it spotted that the harness used for executing the tests against the browser simply hadn’t been updated to support the newly added flexbox properties. I’m impressed that it didn’t get entirely stuck in a loop and explored other potential causes of failure. However, I didn’t want it to go through this same process every time. Lessons need to be learnt!
My first thought was to update the copilot instructions as follows:
Update
#file:copilot-instructions.md, ensuring that the#file:layout-browser.test.jsis updated to ensure support for any newly added CSS properties and features before you execute the test suite.
However, this doesn’t feel like an AI-first way of approaching the problem. I could see from the chain of thought process for implementing this increment that the agent had reached various conclusions that may be of use for further iterations.
This felt like a better approach:
based on this session, update
#file:copilot-instructions.mdwith any instructions that would make future iterations easier
This is more AI-first, but can I make it more agentic? i.e. create a feedback loop that keeps running.
update
#file:copilot-instructions.mdso that with each increment, after successful completion, the copilot instructions are updated with any tips to make future iterations easier
That’s more like it!
Here is an example of some of the ‘lessons learnt’ it added on future iterations:
**Lessons Learned:**
- Cross-axis alignment calculations must account for margins on both sides
- `stretch` only applies when height is undefined (auto)
- `align-self` on children overrides container's `align-items`
- Browser sub-pixel rendering can cause minor floating-point differences (~0.005px)
  - Solution: Use fuzzy comparison with 0.02px tolerance in tests
- For `center` alignment: `y = paddingTop + marginTop + (availableSpace - height) / 2`
- For `flex-end`: `y = paddingTop + contentHeight - marginBottom - height`
- For `stretch`: height = `contentHeight - marginTop - marginBottom`
It’s hard to know whether the above is genuinely useful, but it doesn’t look too dissimilar to the type of notes a human might make if they were writing this algorithm.
Increment #4: Cross-axis sizing + alignment
Proceed to implement increment 4
By this point the process was running quite autonomously, I felt confident I could just instruct it to work through all the increments to completion. However, I’m here for the learning, I want to observe the agents behaviour and better understand how to guide it.
One interesting thing I observed on this increment was the agent botched a file edit causing it to corrupt a file. It restored the file from git, then proceeded more cautiously with smaller edits. Other than that, it breezed through this iteration.
By this point the layout algorithm was around 200 lines of code, with a suite of ~80 tests, and I’d spent about one hour on the whole exercise.
Increment #5 / #6: Column direction and axis abstraction
Increment 5 was uneventful, but on the subsequent increment I could see the agent really having to put some hard work in with two tests that persistently failed.
It was amusing watching the chain of thought, a mixture of exclamations and reflections.
- “actually wait”
- “erm no”
- “this is strange”
- “my understanding is wrong”
- “Wait, that’s not quite right either. The issue is more subtle …”
This is exactly the sort of monologue that runs through my head when I get stuck!
The agent employed various creative debugging techniques, logging the output from various steps of the layout algorithm, eventually resolving the issue.
Visual validation
While I was impressed with the progress I’d made up to this point, I couldn’t help but feel the need to test and validate the algorithm myself. What if the agent was building an elaborate Potemkin village? What if the layout algorithm was a complex ruse hiding a suite of tests that were little more than assert.true(true)?
I prompted the agent to build a visual test suite, which allayed my concerns:
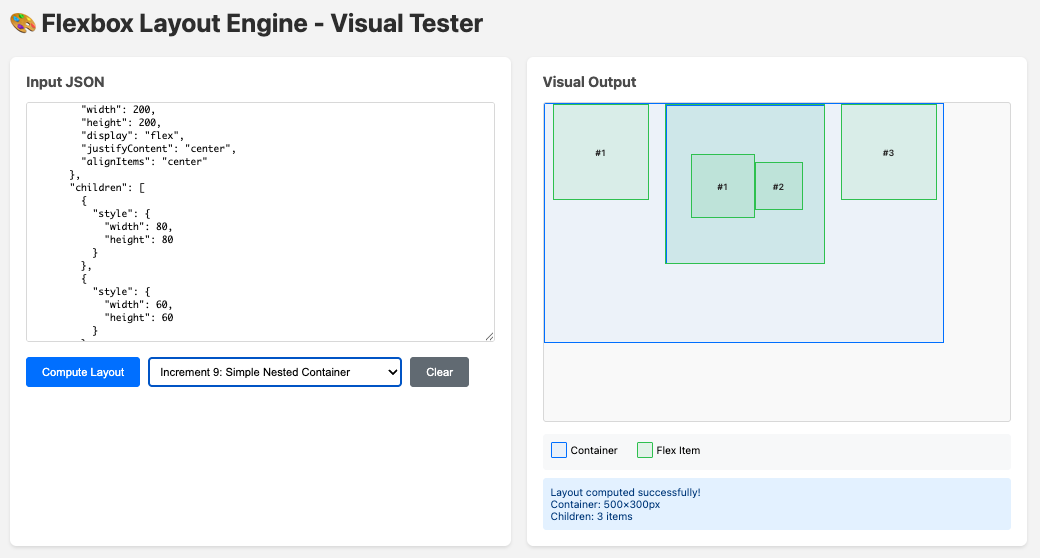
I can trust my AI agent. That’s a relief.
Increment #7-9
Again, these were uneventful steps, challenging for the agent, but the feedback loop and creative debugging allowed it to complete each increment without assistance (which is good, because flexbox makes my head hurt).
By the end of the final increment I was around three hours into the whole experiment. The layout algorithm was around ~800 lines, with a suite of ~350 tests. An impressive result.
In the space of three hours I had achieved something which took Vjeux around two weeks back in 2015.
As a final validation, I ported the 2015 test suite to run against my implementation. It did uncover a couple of small edge cases, and some subtle differences due to different defaults (React Native used slightly different layout defaults from the browser).
If you’re interested in the detail, the project can be found on GitHub. I’ve included the prompts I used within the commit messages.
Lessons learnt
I found the exercise to be a really interesting learning experience. While the agent was pushing through each increment, I made some notes and reflections.
Building the right feedback mechanism
Prior to agentic AI there has been a lot of focus placed on describing tasks, adding context and prompt engineering in order to improve the success rate of a one shot implementation. With agentic loops, a model can make multiple attempts at the implementation and as a result, an effective feedback mechanism is probably more important than a well crafted prompt.
In this example, the feedback mechanism was quite idealised. A self-contained algorithm and the availability of a reference implementation gave the agent the opportunity to perform both one-off validations and create an extensive array of regression tests.
For most projects things are going to be a lot less ideal. However, with creativity and engineering expertise I’m sure that some form of feedback mechanism can be built for most tasks.
Observe and tune the loop
With the first few increments I found myself tweaking the feedback loop and optimising the instructions based on where I’d seen the agent struggle. This involved both the observation of obvious failures and more subtle challenges gleaned from reading the chain of thought.
Based on these observations I made updates to the Copilot instructions, which were effectively the ‘master’ prompt for this process.
No, I don’t consider this prompt engineering. An engineering discipline implies care, precision and a meticulous approach. This was nothing of the sort. When I felt there were aspects of the ‘loop’ that could be optimised, I gave the agent a few sentences of explanation and let it update the instructions itself. That isn’t engineering in my books. It’s more like coaching.
Self improvement
LLMs are stateless systems, they don’t remember and they don’t learn. However, in an extension of the above point, an agent can reflect on its thought process, the challenges it has faced (and overcome) in implementing an increment and provide guidance for its future self.
It was interesting watching it create new tools that it could use for future iterations.
Let it run free
With my experiment I kept a watchful eye on the agent as it progressed through all of the final increments. Not because I was worried that it might make a mistake or do something destructive, rather, I wanted to watch and learn. In reality, once the loop is optimised, you shouldn’t sit and watch - you should get on with something more worthwhile!
My main learning from watching the agent was just how ‘human’ the whole process was. Reading the thought process felt so very familiar. Watching it encounter problems, pursue candidate solutions to eventual dead ends, back-up and try something new, all the while employing a range of creative approaches - debugging and scripting.
Is anyone still making the stochastic parrot argument? Agents can clearly think.
Not every problem is amenable to a feedback loop.
It would be remiss of me not to point out that this experiment was an idealised case. The feedback loop was near perfect, both able to exhaustively describe the desired behaviour, and near trivial to create due to the reference implementation. Furthermore, flexbox layout is a very familiar domain for the agent, with lots of relevant material within the underlying LLMs training dataset.
However, it has opened my eyes to just how productive AI agents can be given an effective feedback loop. In future, I’m going to invest a lot more time in considering how to create these loops. Can I create a loop to support legacy migration? Can you use MCP to create a loop via UI automation? And what loops do humans use to validate their work (and can they be automated)?
Once again, I’ll echo Simon’s remark that designing agentic loops is going to be a critical skill.