
This blog post shows an implementation of Conway’s Game of Life using functional techniques in Swift. This results in code which is a clear and concise representation of the game’s logic. I also take a closer look at ranges, intervals, the pattern match operator, ~= and how local functions help organise your code.
Introduction
The Game of Life was invented by British mathematician John Conway in the 1970 and become an instant hit among microcomputer owners. The game itself is very simple, the world is modelled as an n x n grid where cells can either be alive or dead. Each generation, or turn, in the game the following rules are applied:
- Any dead cell with exactly three neighbours becomes alive
- Any live cell with more than 3 or less than 2 neighbours dies, due to overcrowding or loneliness respectively.
The simplicity of this game has made it something of a programming standard - the next step up from “Hello World”
Unsurprisingly I’ve seen a number of Game of Life implementations in Swift crop up on GitHub, however, few of those which I have found seem to take advantage of the functional aspects of Swift.
I decided to have a go at implementing Life using functional techniques. To skip to the punch-line, here’s the game logic from my implementation:
// rules of life
let liveCells = cells.filter { $0.state == .Alive }
let deadCells = cells.filter { $0.state != .Alive }

let dyingCells = liveCells.filter { livingNeighboursForCell($0) !~= 2...3 }
let newLife =  deadCells.filter { livingNeighboursForCell($0) == 3 }

// updating the world state
newLife.each { (cell: Cell) in cell.state = .Alive }
dyingCells.each { (cell: Cell) in cell.state = .Dead }
You can very easily see the rules of Life and how they are being applied in the above code.
The rest of this blog post delves into the implementation details …
A World of Cells
The world that Life defines is a 2-dimensional array of cells.
This can be modelled by a Cell class and a State enumeration:
class Cell {
  let x: Int, y: Int
  var state: State

  init (x: Int, y: Int) {
    self.x = x
    self.y = y
    state = .NeverLived
  }
}

enum State {
  case Alive, Dead, NeverLived
}
The x and y coordinates of the cell are constants, whereas its state can change. The NeverLived state was added for artistic reasons, this allows you to distinguish between cells that are now dead, and those which never contained life!
The world can be modelled as a class which contains a constant array of cells:
class World {

  let cells: [Cell]
  let dimensions: Int = 20

  init() {
    cells = [Cell]()

    // create the cells
    for x in 0..<dimensions {
      for y in 0..<dimensions {
        cells.append(Cell(x: x, y: y))
      }
    }
  }

  subscript (x: Int, y: Int) -> Cell? {
    return cells.filter { $0.x == x && $0.y == y }.first
  }
}
Two-dimensional arrays are cumbersome, both to create and to iterate over, so I opted to use a one-dimensional array to contain the cells. This does of course mean that the subscript that allows access to the cells using the concise syntax world[4, 5] does incur a performance hit because it is implemented as a filter operation. Although this is unlikely to be an issue.
The Rules of Life
The World class provides a simple model which is a suitable place to add the rules of Life.
Rules for new life
The first rule is as follows:
- Any dead cell with exactly three neighbours becomes alive
Finding dead cells is easy, Swift arrays have a filter method that returns a new array containing all the items that pass the ‘test’ as described by the supplied closure. I’ve added the Life logic to an iterate method on the World class:
class World {
  ...
  func iterate() {
    let deadCells = cells.filter { $0.state != .Alive }
  }
}
Now that the dead cells have been located the next task is to find those with three live neighbours. This can be implemented by applying a further filter to the dead cells:
let deadCells = cells.filter { $0.state != .Alive }
let newLife =  deadCells.filter { livingNeighboursForCell($0) == 3 }
The additional filter uses a function, livingNeighboursForCell, which hasn’t been defined yet.
Splitting this problem into its component parts, the following function tests whether two cells are neighbours:
let cellsAreNeighbours = {
  (op1: Cell, op2: Cell) -> Bool in
  let delta = (abs(op1.x - op2.x), abs(op1.y - op2.y))
  switch (delta) {
  case (1,1), (1,0), (0,1):
    return true
  default:
    return false
  }
}
NOTE: Swift does not allow you to reference local functions from within other local functions. As a result, the cellsAreNeighbours is constant defined using a closure expression, giving something that is equivalent to a local function.
With the above function it is a straightforward task to locate the neighbours for a cell:
let neighboursForCell = {
  (cell: Cell) -> [Cell] in
  return self.cells.filter { cellsAreNeighbours(cell, $0)}
}
And with the above, the living neighbours can be found:
let livingNeighboursForCell = {
  (cell: Cell) -> Int in
  neighboursForCell(cell).filter{ $0.state == State.Alive }.count
}
This gives the utility functions required to find the number of live neighbours for each dead cell.
What I really like about this implementation is that it splits the problem up into small discrete units, each of which is easy to understand, rather than having one big ‘blob’ of logic.
NOTE: You’ve probably noticed that this code isn’t very optimal from a performance perspective. The neighbours for a cell never change, so continually recomputing this is wasteful. I didn’t want to ‘spoil’ my code by optimising at this stage, in a future post I might look at how memoization can be used to improve performance without significantly changing the approach.
Rules for death!
The second rule in Life is as follows:
- Any live cell with more than 3 or less than 2 neighbours dies, due to overcrowding or loneliness respectively.
Which is very easy to implement using the new livingNeighboursForCell function
let liveCells = cells.filter { $0.state == .Alive }
let dyingCells = liveCells.filter { livingNeighboursForCell($0) !~= 2...3 }
Although you are probable wondering what that odd looking !~= operator is all about!
The ‘standard’ method for determining whether a value is greater than three of less than two is as follows:
if value < 2 || value > 3 { ... }However, the pattern matching capabilities of Swift’s switch construct provide an interesting alternative:
switch value {
case 2...3:
   println("In the range 2 - 3")
default:
   prinltn("Not in range")
}
It would be great to be able to use this range-matching outside of the switch construct. Fortunately this is possible via the ~= operator, which is defined as follows:
/// Returns `true` iff `pattern` contains `value`
func ~=<I : IntervalType>(pattern: I, value: I.Bound) -> Bool
This operator returns true if the pattern, which adopts in the IntervalType protocol, contains value, which has a type constraint that must match the Bound type alias.
Interestingly the range operators, n...m, n..<m produce a range or an interval depending on the context of there usage. If used within a switch-case an interval is produced, whereas used outside of that context a range is produced.
You can try this out in a playground. The following creates an interval and tests whether it contains an integer:
2...3 ~= 2 // trueHowever, the following seemingly equivalent code fails:
let range = 2...3
range ~= 2   // error: Range does not conform to protocol IntervalType
Very odd!
Anyhow, the test I require for my code is to determine whether a value is outside of a range. This can of course be achieved like so, !(2...3 ~= 2), but I just couldn’t resist creating my own operator (I know I probably shouldn’t!)
infix operator !~= {}

func !~= <I : IntervalType>(value: I.Bound, pattern: I) -> Bool {
  return !(pattern ~= value)
}
With this in place, my Life logic is complete
Updating the cells
Now that I have an array of cells that are contain dying cells, and another that contains new life, I simply need to iterate over these arrays updating the cell’s state.
Rather than conclude the method with a for-in loop I decided to add an Array extension to give a more functional feel to this code:
extension Array {
  func each<T>(fn: (T) -> ()) {
    for item in self {
      let itemAsT = item as T
      fn(itemAsT)
    }
  }
}
Notice that you cannot extend Array<T>, as a direct consequence when this extension method is used, the closure expressions must include an explicit type:
// updating the world state
newLife.each { (cell: Cell) in cell.state = .Alive }
dyingCells.each { (cell: Cell) in cell.state = .Dead }
The (cell: Cell) component is used to infer that T is a Cell in this context. Without this information, the compiler cannot determine the type of items within the array.
Putting it all together
Here’s the complete implementation of the iterate method:
func iterate() {

  // utility functions - cannot reference a local function from another
  // local function, hence defined as constant closures
  let cellsAreNeighbours = {
    (op1: Cell, op2: Cell) -> Bool in
    let delta = (abs(op1.x - op2.x), abs(op1.y - op2.y))
    switch (delta) {
    case (1,1), (1,0), (0,1):
      return true
    default:
      return false
    }
  }

  let neighboursForCell = {
    (cell: Cell) -> [Cell] in
    return self.cells.filter { cellsAreNeighbours(cell, $0)}
  }

  let livingNeighboursForCell = {
    (cell: Cell) -> Int in
    neighboursForCell(cell).filter{ $0.state == State.Alive }.count
  }

  // rules of life
  let liveCells = cells.filter { $0.state == .Alive }
  let deadCells = cells.filter { $0.state != .Alive }

  let dyingCells = liveCells.filter { livingNeighboursForCell($0) !~= 2...3 }
  let newLife =  deadCells.filter { livingNeighboursForCell($0) == 3 }

  // updating the world state
  newLife.each { (cell: Cell) in cell.state = .Alive }
  dyingCells.each { (cell: Cell) in cell.state = .Dead }
}
There are a couple of things I really like about this code:
- The functional nature makes it really easy to see the rules of Life and how they have been applied
- The use of local functions (or in this case the equivalent constant closures), allows you to structure your code without the need for private ‘helper’ methods.
Local functions FTW!
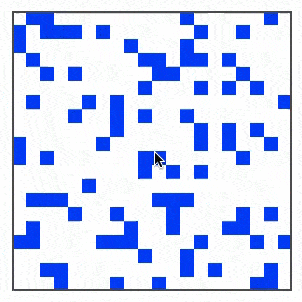
I liked the pattern of splitting methods up into smaller units via local functions so much that I employed it elsewhere in my code. The project contains a UIView subclass, WorldView, which uses Core Graphics to render the current stat of the World.
The drawRect function iterates over each cell, filling small rectangle based on the cell state:
override func drawRect(rect: CGRect) {
  let context = UIGraphicsGetCurrentContext()

  for cell in world.cells {
    // determine the cell color
    var color: UIColor
    switch cell.state {
    case .Alive:
      color = UIColor.blueColor()
    case .Dead:
      color = UIColor.lightGrayColor()
    case .NeverLived:
      color = UIColor.whiteColor()
    }
    CGContextSetFillColorWithColor(context, color.CGColor)

    // compute the required frame
    let dimensions = CGFloat(self.world.dimensions)
    let cellSize = CGSizeMake(self.bounds.width / dimensions,
                                    self.bounds.height / dimensions)
    let cellFrame = CGRectMake(CGFloat(cell.x) * cellSize.width,
         CGFloat(cell.y) * cellSize.height, cellSize.width, cellSize.height)
    CGContextAddRect(context, cellFrame)

    // fill the cell
    CGContextFillPath(context)
  }
}
Pulling out the logic which determines the colour for a cell and the frame for a cell into local functions, makes the code a lot clearer:
override func drawRect(rect: CGRect) {
  let context = UIGraphicsGetCurrentContext()

  func fillColorForCell (state: State) -> UIColor {
    switch state {
    case .Alive:
      return UIColor.blueColor()
    case .Dead:
      return UIColor.lightGrayColor()
    case .NeverLived:
      return UIColor.whiteColor()
    }
  }

  func frameForCell (cell: Cell) -> CGRect {
    let dimensions = CGFloat(self.world.dimensions)
    let cellSize = CGSizeMake(self.bounds.width / dimensions,
                                self.bounds.height / dimensions)
    return CGRectMake(CGFloat(cell.x) * cellSize.width,
       CGFloat(cell.y) * cellSize.height, cellSize.width, cellSize.height)
  }

  for cell in world.cells {
    CGContextSetFillColorWithColor(context, fillColorForCell(cell.state).CGColor)
    CGContextAddRect(context, frameForCell(cell))
    CGContextFillPath(context)
  }
}
This is a pattern that I think I am going to find myself using more and more often!
The code for this application is available on GitHub, let me know what you think of this functional approach?
Regards, Colin E.